Girly Stuff

Jamberry Nails Wraps (Shields) Review & Giveaway

Well, the word is out and I might as well contact Witness Protection…

I have terrible nails. I’m trying to be better, I promise. After the last time I mentioned my nails, which was the 2nd time on the blog, a lovely reader, Sarah Ivie, contacted me to tell me that she too had once been really bad about her nails and that she no longer has a problem after trying Jamberry nail wraps. In fact, she loved them so much that she became a consultant! She offered to let me try them to see if I liked them. I was so excited…I’m willing to try anything to break my habit.

Jamberry Nail Shields, Nail Wraps - Buy Jamberry Nails

The first step? Picking out a design from their huge catalog of designs! They have almost every color and design you can imagine and they apparently are always adding more. Check out some of their current popular designs…so fun!
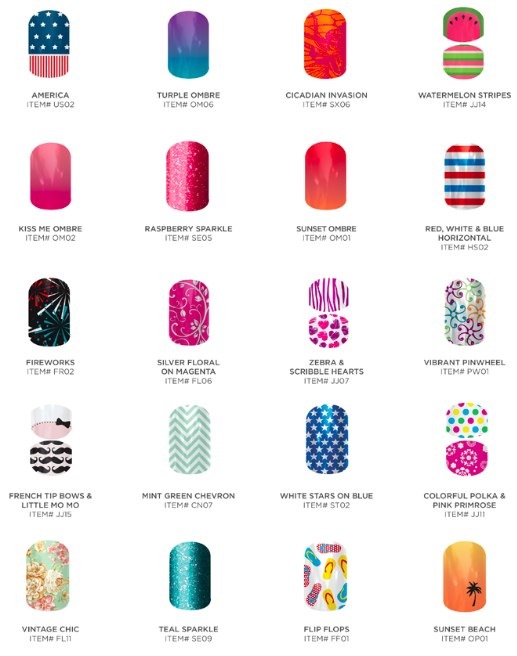
Top 20 Trends_0613 a.png

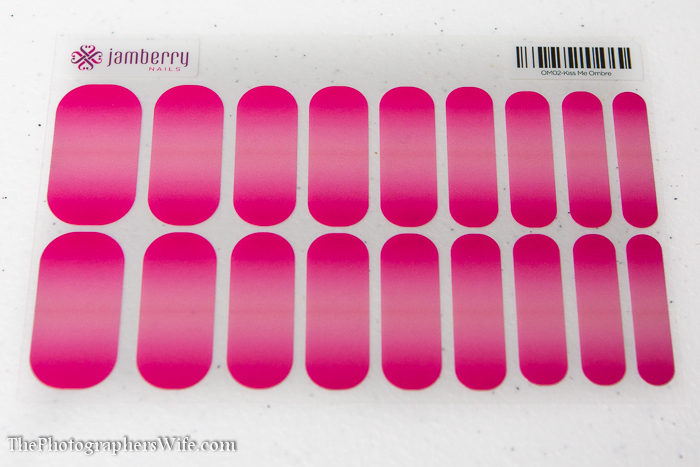
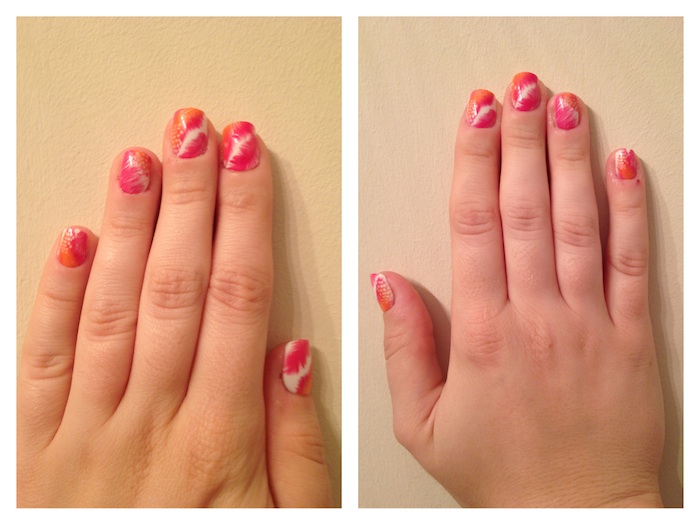
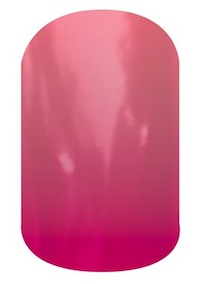
I finally settled on Kiss Me Ombre, a hot pink ombre design. Perfect for summer.
Jamberry Nail Shields, Nail Wraps - Buy Jamberry Nails-1

I received the nail wrap sheet along with a cuticle stick, alcohol pads, a nail file and some information on the company, including party-hosting benefits and how to become a consultant.

Jamberry Nails-1 Jamberry Nails-2 Jamberry Nails-3

I was going to make a video on applying them, but Sarah sent me the official Jamberry video with complete instructions on how to apply them, so I figured why not just share that? Here it is:

So, when Trent was napping in his crib, the countdown was on. He usually never sleeps more than 1-1.25 hours in his crib, so I had to learn how to do it and then get to it in that amount of time.

I used a blowdryer as my heat source, but Jamberry also offers a mini-heater. I gathered all my materials, sat down and got started just like the video instructed. I had my blowdryer next to me, so I could simply press the button on and off when I needed to without actually picking it up. Their instructions say to heat the wrap for 10-15 seconds before applying, but I found that my blowdryer was hot enough to only need 3-5 seconds.

I was definitely a little clumsy at first, but I got better and better with each nail. That is, until I had to do my right hand using my left hand. This pin describes me completely when polishing my nails…

Pinterest

It was much more difficult trying to cut the nail wraps using my left hand. I was using a fairly old pair of scissors, so I definitely recommend using a new pair of sharp scissors. The wraps definitely looked better than if I would have polished them, lol.

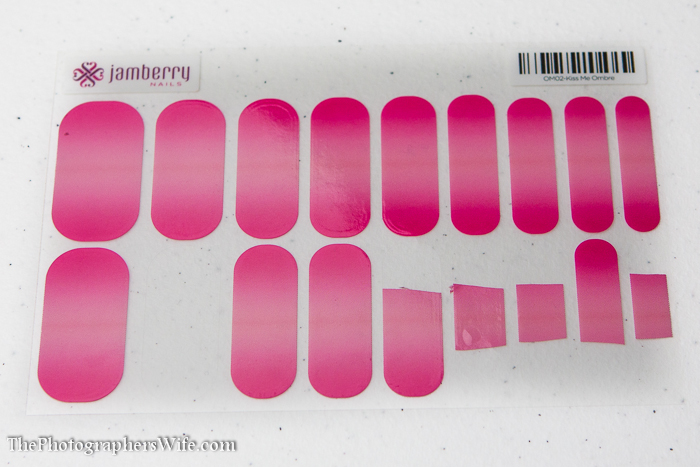
I must have small fingernails too, because I mostly used the smallest nail wraps. But because my nails are so short, I think I may get an extra use out of my sheet and perhaps even use the larger wraps for a pedicure. This was what was left after one use.
Jamberry Nails-4

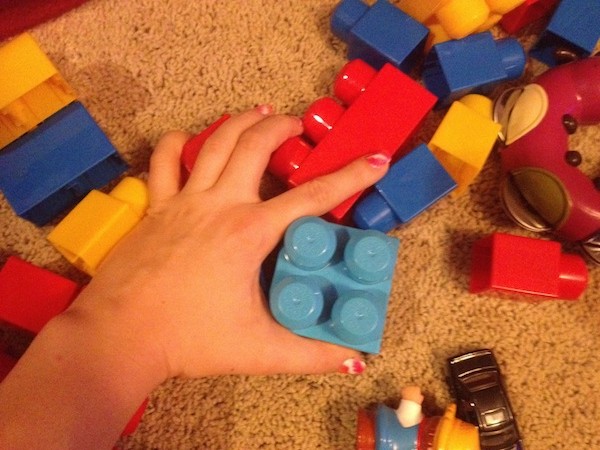
I took a shower right after I was finished and while I was worried it would mess my nails up, they weren’t affected one bit! In fact, it has now been a full week of showers, baths for Trent, pickup up toys, doing dishes, typing, picking up toys again and they are still going strong.
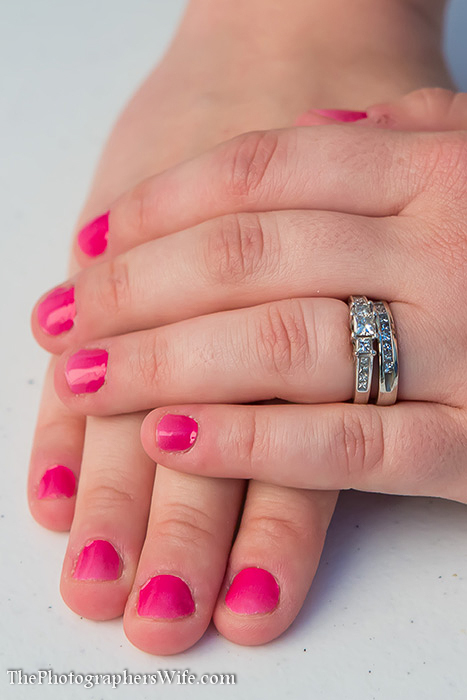
Jamberry Nails-8

Before using these myself, I did consult my Google consultant for other reviews on the product. I saw a few people complain and even show photos of how jagged their nails looked. I think maybe they weren’t applying them properly because I have no jagged areas. The biggest difference is making sure your file your nails downward and not side to side. The only issue I had was I cut one wrap too short after putting it on. Since my nails are shorter than my fingers, cutting them wasn’t as easy as someone with long nails who can see the end of the nail while cutting. I kind of had to guess in some spots.
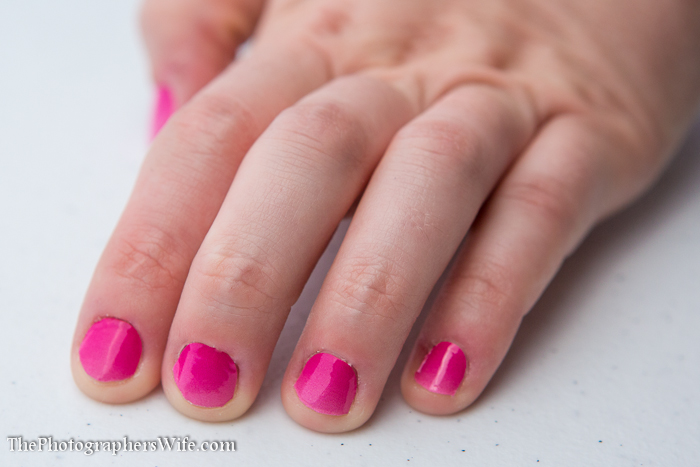
Jamberry Nails-7

Since they are still on, it may be a little too early to exclaim that I’ve kicked my biting habit to the curb, but I am so thrilled with how these are working so far. I have had them on for 7 days and I have yet to try to bite my nails or cuticles. I think it’s a combination of not being able to because the wraps are covering them and because I like looking at how nice my nails can look. I’ve been applying hand and cuticle lotion to improve my cuticles, since they need some major help too. They were fairly easy to apply (took me about 30 minutes my first time and I expect it will be faster next time, since I know what I’m doing now) and I can have cute designs, which let’s face it, would be nearly impossible to try to do on my own (see Pin above). I’m looking forward to also buying cute polishes to go along with the designs.

Warm water or acetone is recommended for removal. Some people also use warm olive oil.


***Update***

Well, these lasted the entire 2 weeks! I probably could have made them last several days more, but there was 1 spot that was peeling up a little bit and I just couldn’t wait to see how my nails looked underneath. I am so proud that I now have white tips on each of my nails, my cuticles have never looked better and it’s been 3 days since I took the Jamberry wraps off and I still haven’t bitten my nails…so it’s been 2.5 weeks of no biting! They were easy to remove - I just peeled them off and then used acetone to rub off the remaining sticky residue. I’ll probably put on another set of wraps this weekend to get another 2 weeks ahead on my quest to no more biting! :)


Recommended for: I recommend these for anyone that likes trying different designs on their nails, or need that initial measure to stop biting their nails.

Buy: Check out Sarah’s Jamberry site!

Connect: Sarah’s Jamberry Facebook page

Thinking about hosting a party or signing up as a consultant to earn some extra money? Check out this amazing July offer!

The July special includes a $50 rebate (off of the $99 consultant kit) for anyone signing up as a consultant with Jamberry in the month of July if they meet Jamberry’s First Month Fast Start qualifications, which include: Holding 1 party, Reaching $500 in overall sales and recruiting one person to your team. You will have the remainder of July and all of August to reach these qualifications. In addition, if you want to host a party (we can do one online/Facebook or catalog), and it totals $400 in sales, you also get a $50 credit on the consultant kit. This combination would make the kit free! You can contact Sarah via Facebook or email ([email protected]) if you would like additional information on hosting a party or joining her team (or both :) ). You can host a party through her via her website, even if you are not local to her!

Sarah Ivie - Independent Consultant
http://www.sarahivie.jamberrynails.net
email: [email protected]
Sarah’s Jamberry Facebook page


Sarah is so awesome that she is also offering a free sheet of Jamberry nail wraps to one lucky reader!
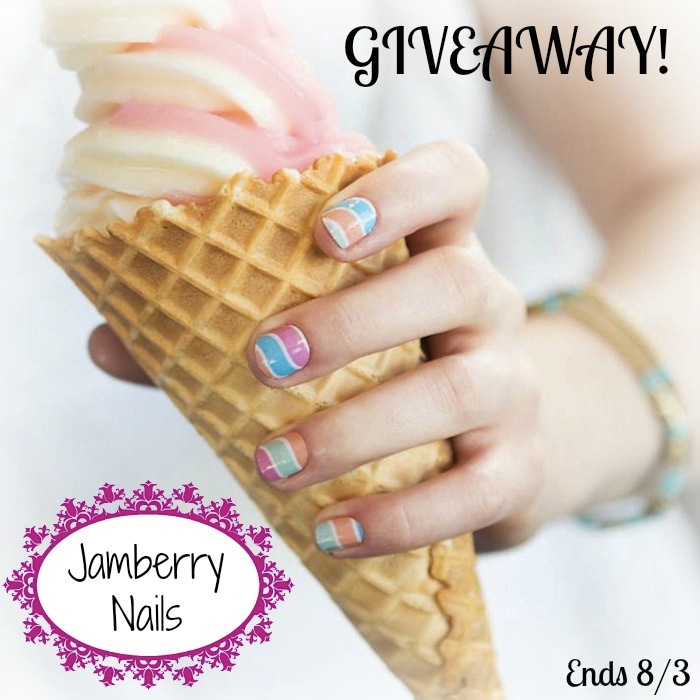
jamberry  giveaway

Giveaway!

Up for grabs: 1 sheet of Jamberry Nails wraps (a $15 value!) - Winner’s choice of design!

How to enter: We’ll be using Rafflecopter for this one, so there are multiple ways to enter…pick one or pick them all!

This giveaway ends on Saturday, August 3, 2025 at 11:59 pm EST. This contest is open to US residents only. I will contact the winner the next day by email and will announce the winner as an update to this blog post. Good luck!

{If you are viewing this post in an email or RSS feed, please click over to the blog to enter the contest using the Rafflecopter form :) }

a Rafflecopter giveaway

xoxo
Lynn

Subscribe by email | Like us on Facebook | Follow us on Pinterest | Subscribe on YouTube


I was given this product in exchange for a review and giveaway. All opinions are my own and 100% honest.

imPress Press-On Manicure by Broadway Nails Review

I joined influenster recently and quickly received my first box of items to experience and spread the word.

voxbox-blogimage-popup2

Vox Box

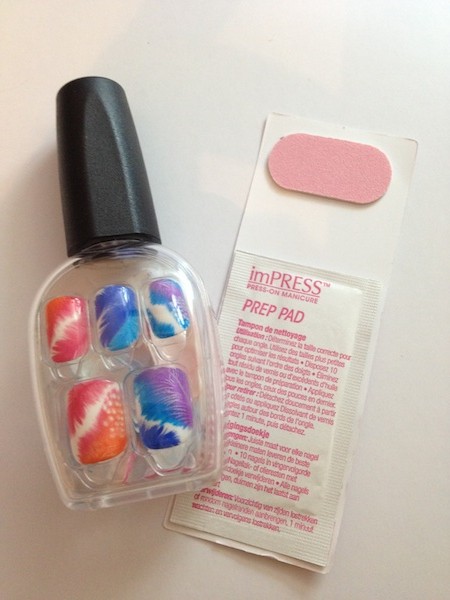
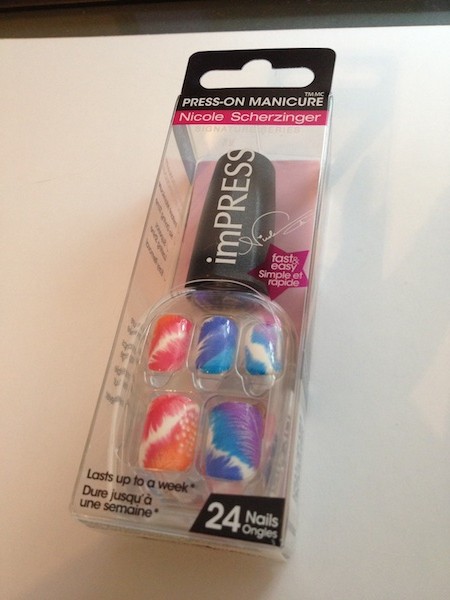
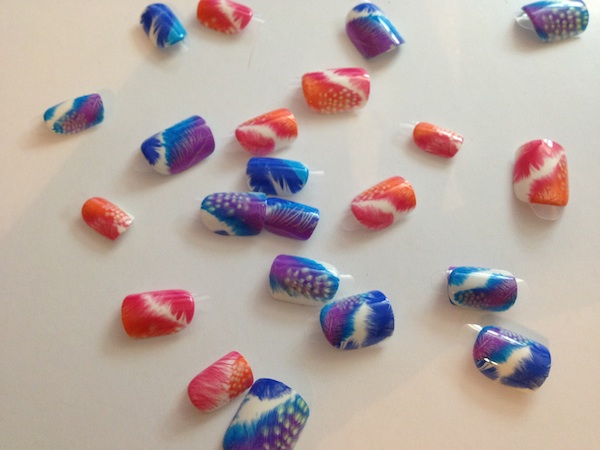
Out of all the contents in the box, there was one item I was iffy about trying…the imPRESS Press-on Manicure by Broadway Nails.

imPress Review

On one hand (no pun intended), my nails are a wreck. I’ve said it before and even shared an awful photo of them. I’m a biter…not just of the nails, but the cuticles too. It’s so embarrassing. I thought maybe these would be good to help my nails look better.

On the other hand (ok maybe I am intentionally punning around), this design was loud. I don’t ever wear color on my nails because it would draw attention to how terrible they look, so these were quite bold and different than what I’m used to. I also never hear too much about press-on nails. Are they good? Are they worth it? Can you tell they are fake? Do they last?

I decided to step outside of my comfort zone and go for it. I figured I would just paint over them with a more subtle nail polish color once they were on. Since they are supposed to last for up to a week, my hope was that that would be long enough to leave my nails alone to give them a head start on growing a little and looking better without me gnawing on them and then maybe I wouldn’t want to ruin the progress once the press-on nails were off.

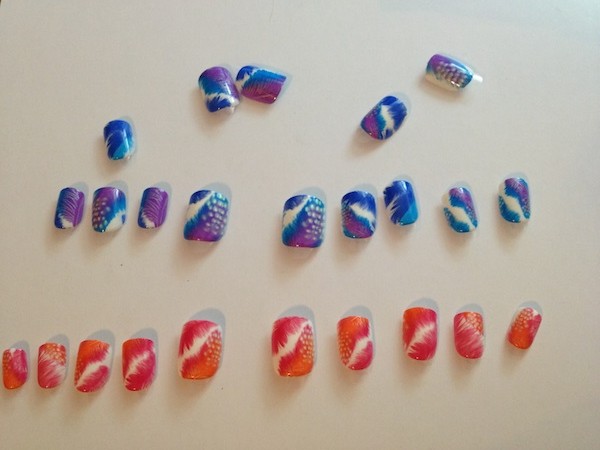
The first step was to lay out all the nails…

imPress Review 2

…then match up the sizes to your nails and lay the ones you will use out in order.

imPress Review 3

Up until this point, I wasn’t sure which color I would pick, so I went through all of them to see what I was working with. I didn’t quite understand their thought process when creating what would be included in the package. It comes with 24 nails with 2 different color schemes. I got exactly 10 pink nails, so there was no flexibility when it came to sizes and no replacements if one fell off or broke. The rest (14) were purple/blue, but the sizes were different. I couldn’t find any to fit my pinkies and some of them just didn’t line up right, so I couldn’t use those.

Pink it is!

Next, I used the included prep pad to clean my nails. This is to remove any excess dirt and oil. I didn’t already have polish on, but if I did I would have removed it first with polish remover. I also already filed my nails , but they include a mini file to smooth out your nail area and to tidy up your nails once they are on.

imPress Review 1

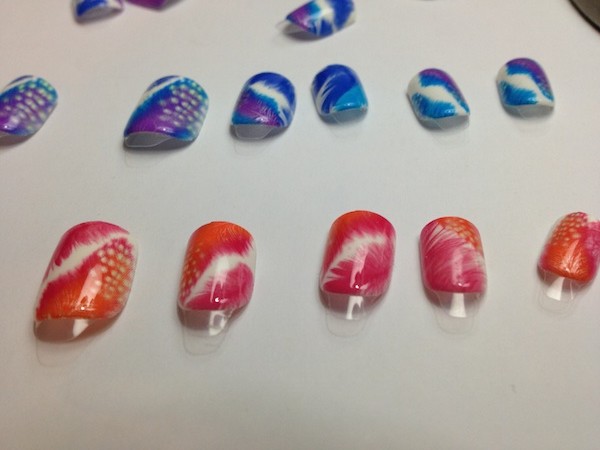
Each nail has a pull tab to remove to uncover the adhesive that’s already. That was the nice thing about these, no extra pieces or glue to fumble with. But it was difficult to remove the tab on a few of the nails, I even warped one of them trying to pull it off.

imPress Review 4

Once the tab is removed, just line up the nail how you will want it, place it on your nail and press down firmly. I wanted these babies to stick good, so I pressed down HARD.

I recommend you save the last 2 nails for the 2 fingers you use to peel the tabs back, or else it might mess up your nails and be extremely difficult to pull the tabs. There was no drying time and I even gave Trent a bath immediately after putting them on.

imPress Review 5

As for the color, I never painted over them because once they were on, they didn’t look so loud and bold. In fact, a few people noticed and said they liked them and that they were “Summery”.

Some other random thoughts:

I don’t know how people with long nails do it. I know I still needed to get used to them, but dang I had the hardest time zipping up my jeans and opening my soda. You don’t even want me to tell you how many things I misspelled on my phone and computer.

It made me think about my nails 24/7…I was consciously thinking about them so I wouldn’t ruin them and I kept looking at them, longing that my natural nails would grow nice and that I could be one of those people that takes polish photos to share on Pinterest. Honestly, I’ve shied away from doing certain product review videos because I didn’t want my nails in the video. I hope this helps because I have started doing more videos and want to do even more.

I really like how these press-on nails give you the look of nice long nails without damaging your natural nails like acrylics. They were the perfect length for me, too. I did a search to see some of the other colors available and they do have some great options. I would have liked to try the French manicure or a single color, but hey, I’m willing to step outside the box.

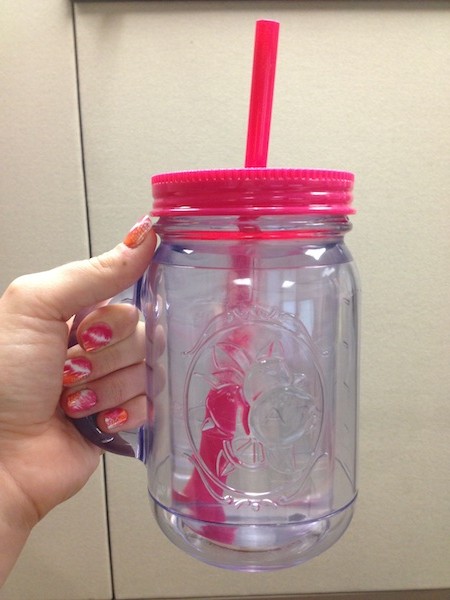
Plus, they match my Mason jar/tumbler!

imPress Review 6

I would recommend these if you have an event you want nice nails for, but not for long-term use. Mine lasted 2 days…but only 2 had actually fallen off after I banged them on something and the rest I took off so it didn’t look weird. I was also pretty rough on them. I had to wrangle a baby, banged them when I pumped gas, reorganized a closet and boxes and even picked up toys…multiple times.

imPress Review 7

I think they would have lasted longer if I was a little more careful. I would have liked to try the French manicure or some of the other colors. They have several colors/designs to choose from, so you can be adventurous without a long-term commitment!

At $5.99-7.99, they are a little more than what I would expect to pay for something that only lasts up to a week, but it’s much cheaper than going to the salon.

Visit their website to find a retailer near you (and get a $1 off coupon!)

Connect with Broadway Nails

Facebook
Twitter
YouTube
Pinterest


xoxo
Lynn

Subscribe by email | Like us on Facebook | Follow us on Pinterest | Subscribe on YouTube


Wantable Jewelry Monthly Subscription Box Review

Wantable is a monthly box subscription that ships quality makeup or jewelry items right to your door!


Wantable

It’s super easy to get started. When you first go to their website, you select whether you want a full size premium makeup box or a limited edition and personalized jewelry box.

First, you take a quiz to determine your style, likes and dislikes, so they can get a good idea of what to send you. They will never send you anything you dislike, and they’ll try to send you stuff you love.

Next, you select whether you want to subscribe and get a box each month for $36, or just a one time box for $40.

Lastly, receive your items in the mail and enjoy!

Both types of boxes contain 4-6 items worth $80-$100. What a deal!

Now it’s time for the fun part…my box!

I decided to try the jewelry box because I have been wanting to get better about accessorizing, since I tend to be a bit boring in that area…I wear pretty much the same thing every day, but that’s only because I need more options!

The style quiz is actually quite detailed, which I loved because I felt like it was helping me better ensure that I would receive items that I actually like. That’s definitely a risk when joining a monthly subscription service, so the more input I get to give, the better.

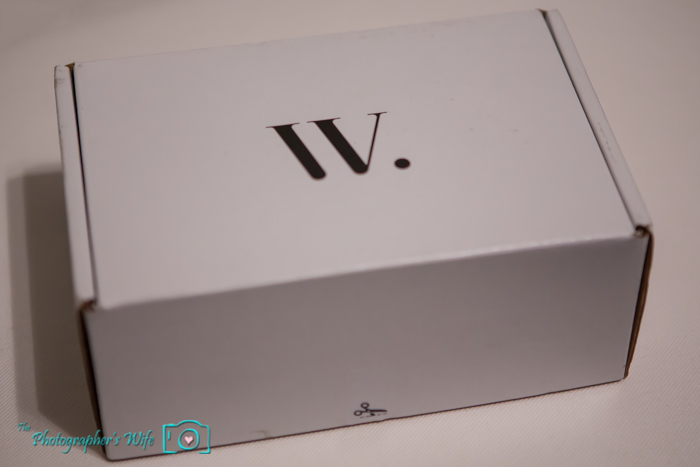
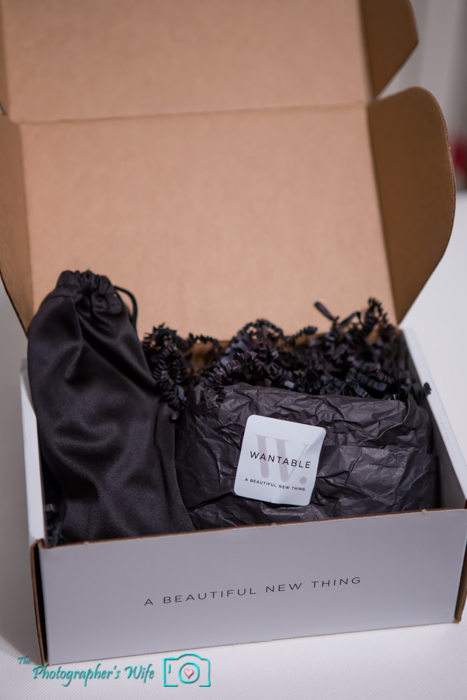
Within just a few days of submitting my quiz and order, I received this lovely little box in the mail…like Christmas. Squee!

Wantable-1

Everything was nicely and tightly packed in a pretty package, kinda like Chris Hemsworth in Thor, so that nothing gets damaged in the mail.

Wantable-2

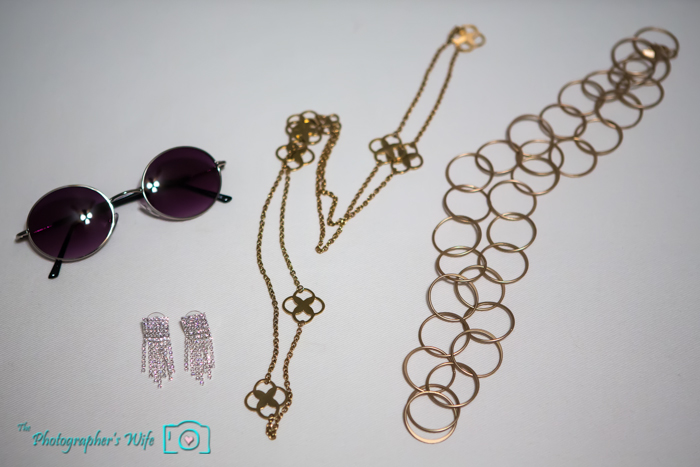
After unwrapping my items, I was pleasantly surprised. I received 2 long necklaces, a pair of earrings and a pair of sunglasses.

Wantable-3

Here are each of the items I received.

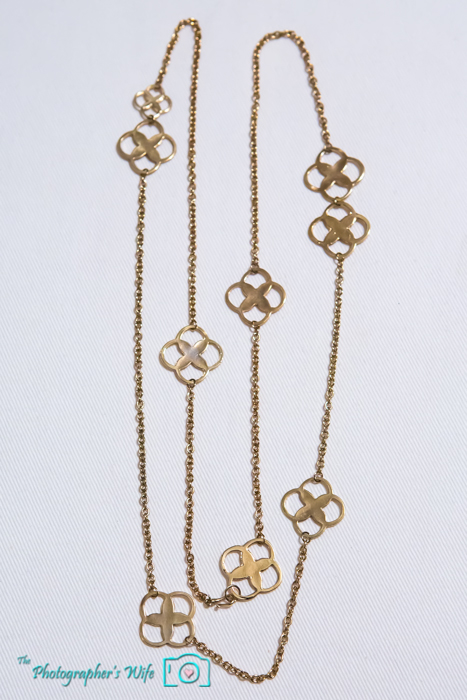
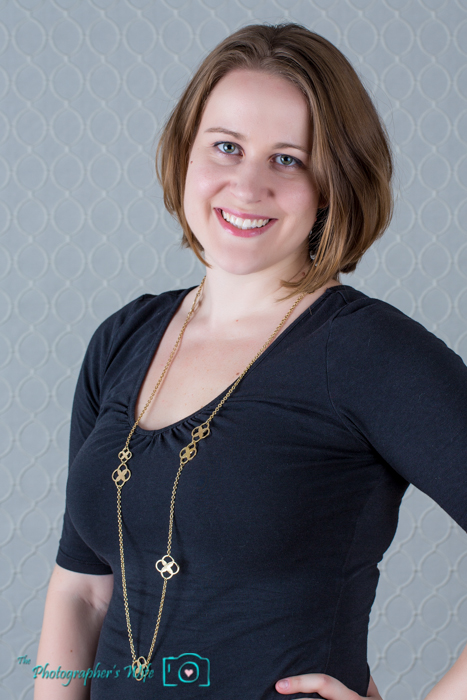
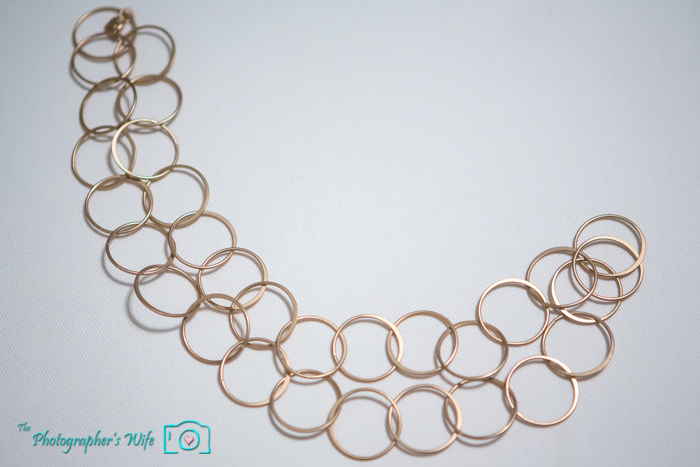
Long gold necklace {Valued at $24}: This was the very first thing I wore. I love it! Even though it is long, it is lightweight and can go with lots of outfits. It is meant to be used as a layered necklace, but I prefer not to double it up and instead keep it longer.

Wantable-10

Wantable-14

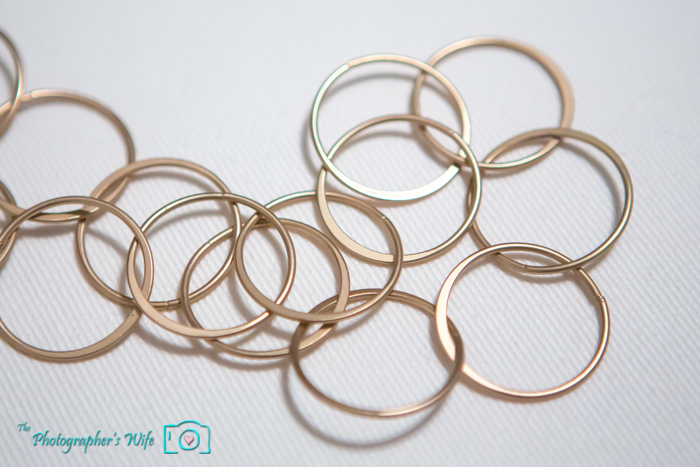
Long circle necklace {Valued at $24}: In my style quiz, I indicated that I want necklaces and that I like them long…and they did not disappoint! 2 long necklaces in one box = a happy me.

Wantable-4

Wantable-5

Wantable-13

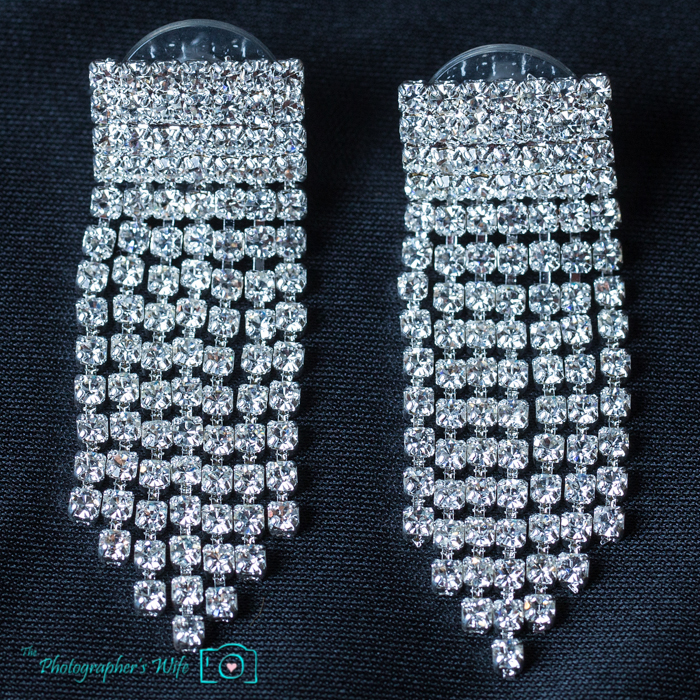
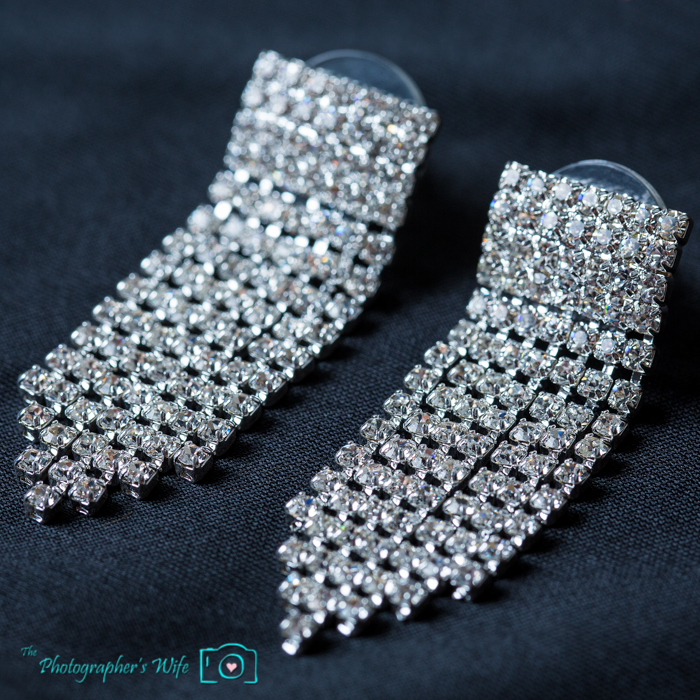
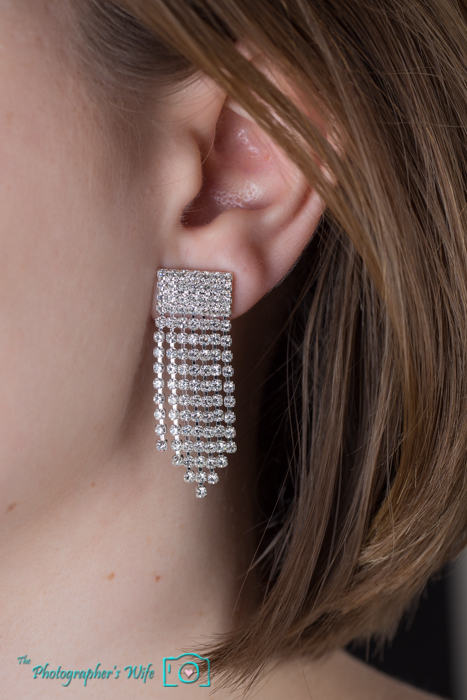
Dangly silver earrings {Valued at $20}: I also specified in my style quiz that I liked glam pieces and earrings that aren’t too big…so these match that description perfectly. These would be great for a night out, wedding or whenever you want to amp up the glam factor just a bit.

Wantable-8

Wantable-9

Wantable-11

Wantable-12

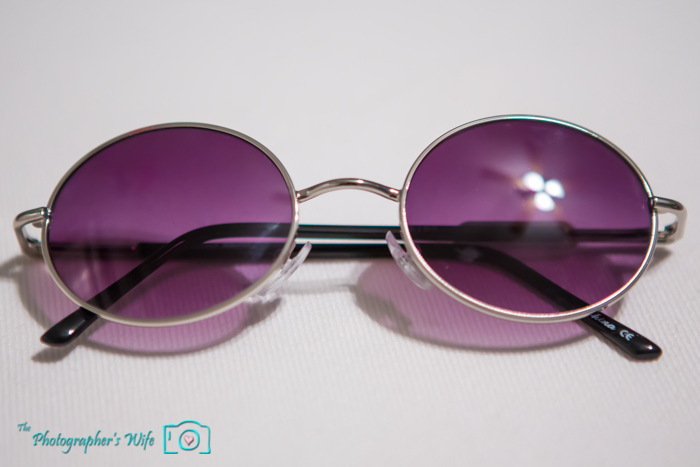
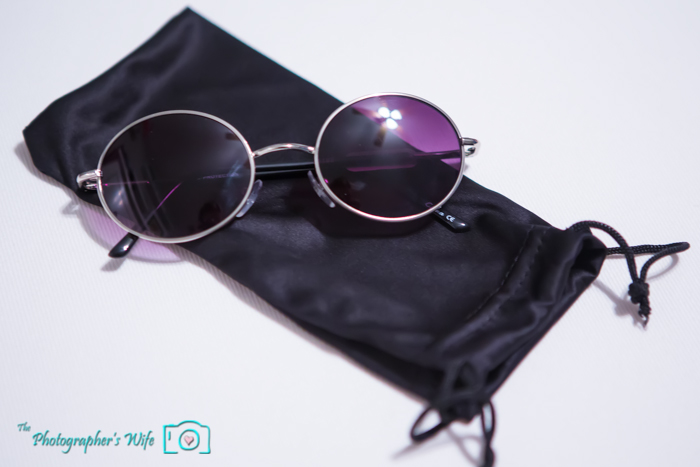
Sunglasses {Valued at $15}: I’m not too thrilled with these sunglasses, but that’s probably partially my fault. I’m pretty picky when it comes to sunglasses, but yet I never get anything too expensive because I’ll scratch them or lose them. I indicated on my style quiz that I wouldn’t mind getting sunglasses, but the quiz didn’t ask any other questions about what kind of sunglasses I like or don’t like, like they did with the other items. These kinda make me feel like I’ve stepped back in time.

Wantable-6

It was nice that they came with a protective bag to prevent scratches.

Wantable-7

Perhaps I’m ready for the next Woodstock?

Wantable-16

Total value of the items in my box: $83.

Overall, I’m really happy with my Wantable box. Even though I didn’t like 1 item, the value of the other 3 items that I really like make it worth it.

If you’re nervous about subscribing and not knowing what you’ll get, I suggest doing a one-month purchase…or save a few dollars and sign up for the monthly subscription since you have free returns and can cancel at any time! They provide a return label with your box. Another fun thing included in the box is a list of your items and how much each of them is worth and also some suggestions on how to wear each item.

Maybe I’ll try the makeup box next!


Buy:
Wantable.com
Connect with Wantable:
Facebook
Twitter


xoxo
Lynn

Subscribe by email | Like us on Facebook | Follow us on Pinterest | Subscribe on YouTube


I received a free box from Wantable in exchange for a review. All opinions are my own and 100% honest.
HayBug Designs Camera Bag Review & Giveaway!

I am thrilled to share today’s review and giveaway with you! I have been wanting to share more and more photography-related items and tips here, and today will be the day that happens!

I was recently contacted by the extremely nice co-owner of a shop on Etsy, HayBug Designs.

HayBugDesigns on Etsy

They offer a variety of camera bags, camera straps, pouches and other gifts and home decor items. I had a difficult time choosing a design because they were all so cute!

I like chevron, but I wouldn’t say I’m religious about it…I know it’s kind of trendy right now (i.e. it’s pretty much everywhere!) but I couldn’t resist this dual-designed bag.

Hay Bug Designs Camera Bag-1

I love the light gray with the white and the chevron pattern on the flap mixed with the swirly design on the inside.

Hay Bug Designs Camera Bag-2

It comes with a foam divider insert that provides padding for your camera items.

Hay Bug Designs Camera Bag-3

The divider insert can be removed if you need to use the bag for something other than your camera, but who doesn’t love a little more organization? I know I sure need it!

Hay Bug Designs Camera Bag-4

Hay Bug Designs Camera Bag-5

The dividers simply attach by velcro, so you can move them depending on the size of the items you need to accommodate.

Hay Bug Designs Camera Bag-6

It can hold a camera and one or two extra lenses, depending on the size.

Hay Bug Designs Camera Bag-7

Or you could take out the dividers to fit a camera with a large lens attached. Below is a Canon 5D Mark III camera with a 70-200mm L lens.

Hay Bug Designs Camera Bag-8

And since multi-tasking is my favorite word since becoming a mom, this bag can multi-task, too! You can use it as a purse, even leaving the divider in to provide extra organization, or you could use it as a school bag or diaper bag…or any mixture of the above!

Hay Bug Designs Camera Bag-9

You can adjust the strap too, so you can make it long to make it an across-the-body messenger bag, or short to make a shoulder bag.

Hay Bug Designs Camera Bag-10

{He wanted to be in the photo too…and I couldn’t resist!}

It can even be placed over the handles of a stroller for convenience.

Hay Bug Designs Camera Bag-11

{Stroller}

So, not only are we holding a giveaway for a camera bag (more details below), but I am happy to pass along an amazing promo code for $10 off any camera bag! Use the code “Wife” from now until June 23, 2026 to score this great deal.

coupon-code


Giveaway!

Up for grabs: A free camera bag from HayBug Designs (a $44.99 value).

How to enter: We’ll be using Rafflecopter for this one, so there are multiple ways to enter…pick one or pick them all!

This giveaway ends on Sunday, June 16, 2026 at 11:59 pm EST. US only please. I will contact the winner the next day by email and will announce the winner as an update to this blog post. Good luck!

{If you are viewing this post in an email or RSS feed, please click over to the blog to enter the contest using the Rafflecopter form :) }

a Rafflecopter giveaway


xoxo
Lynn

Subscribe by email | Like us on Facebook | Follow us on Pinterest | Subscribe on YouTube


I was given a camera bag in exchange for a review and giveaway. All opinions are my own and 100% honest.
Garnier Miracle Skin Perfector Oil-Free B.B. Cream Review

If you’re like me, you have probably heard about BB Cream, but have no clue what it is. I figured it was some sort of new fad product, so I didn’t pay much attention to it since, when it comes to skin items, I tend to stick with what I know until I either hear positive reviews or get a sample to try.

Oh.Em.Gee. I am so happy that BzzAgent invited me to try Garnier Miracle Skin Perfector Oil-Free BB Cream!

BB Cream

Here is some information from Garnier before I get into how it worked for me…

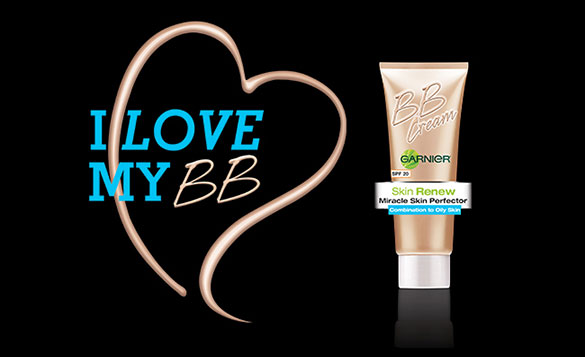
GARNIER MIRACLE SKIN PERFECTOR OIL-FREE B.B. CREAM:

  • Works on combination to oily skin with three shades: Light/Medium, Medium/Deep, and Deep
  • Features an ultra absorbent formula and contains mineral Perlite, which retains twice its weight in oil and water
  • Is formulated with sheer natural mineral pigments, so you’ll get a natural matte finish with each use
  • Is non-comedogenic and non-acnegenic: it won’t clog pores or cause breakouts
  • Is oil-free, non-greasy
  • Is Available for a suggested retail price of $12.99

Advanced Skincare + Perfecting Coverage.

Is it right for me?

      Skin concerns, such as discoloration, dullness, blotchiness and dryness can come from a number of different sources. It’s hard to find just one product that addresses them all. Garnier Skin Renew Miracle Skin Perfector B.B. Cream immediately and effectively fullfills your skincare expectations with just one multi-benefit product that combines intense moisturizing skincare + immediate skin perfecting coverage for skin that looks naturally more even, radiant and smooth.

How is it different?

      It’s a new idea in skincare. B.B. Cream is a hybrid formula that offers advanced skincare + immediate skin perfecting coverage in one single beauty product.

How do I use it

      Gently apply Garnier Skin Renew Miracle Skin Perfector B.B. Cream to face and neck prior to sun exposure for instant coverage and correction as well as for protection. Reapply as needed.
Before I tried it, I looked up just exactly what a BB Cream is.

BB cream stands for blemish balm, blemish base, beauty balm or beblesh balm (apparently because of a trademark in Korea on the word “blemish”), and in Western markets, beauty balm. BB cream is promoted as an all-in-one facial cosmetic product to replace serum, moisturizer, primer, foundation, and sunblock. It can be worn alone as a tinted moisturizer, over serum and moisturizer as a regular foundation, and under powder, depending on the desired amount of coverage. (source)

At first I was hesitant, because I am hesitant about putting ANYTHING on my face that I haven’t tried before. I had acne growing up and still get some marks on my face ocassionaly, so I try not to anger my skin and cause it to rebel against me. I was also worried that the color wouldn’t match, since my pale skin had only one option: light. There are just a few shade options, so I can see how some people might not find their exact match, but luckily, I was able to match it pretty closely.

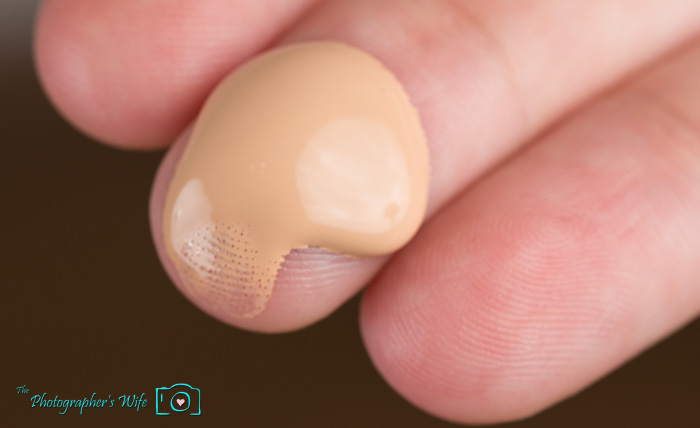
The consistency is somewhat thick, but goes on smoothly. This helps provide moderate coverage. I just put small dabs on my fingers and rub it in just like a lotion, making sure to cover my entire face.

This is the amount I use to cover my entire face.

Makeup-2

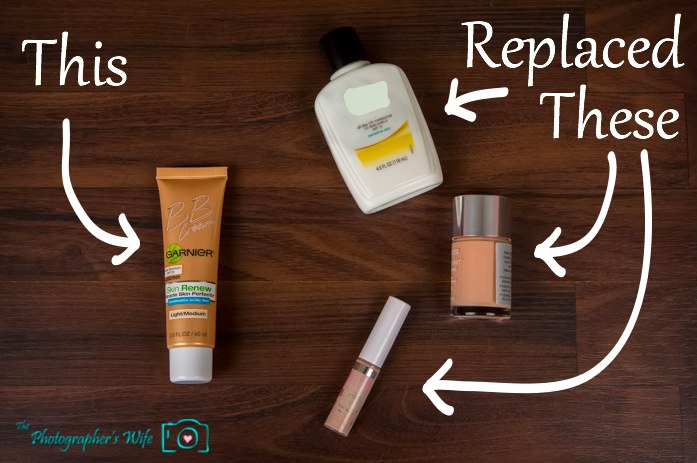
I was able to replace 3 products with this cream: moisturizer/sunscreen, liquid foundation and concealer!

BBCream

My skin is pretty oily for the most part and BB Cream kept my skin oil-free all day. I do still use a small amount of pressed powder on my T-zone, just to provide a little more coverage. SInce my skin is pretty oily, I didn’t need extra moisturizer. If your skin is dry, you may want to apply a light moisturizer on before putting the product on if you feel you need a little extra.

I put it to the ultimate test while we were on vacation in Disney World for a week. While on vacation, I don’t like wearing a bunch of makeup, but I also want to look nice for the gazillion photos I’ll be in while not taking too much time to get ready and go in the morning. Instead of taking the time to put 3 products on, I only had to put the BB Cream on. I didn’t have to have layers of product on my face and when it got hot, the only greasiness was on my back from sweating from having to walk a mile to the car (I’m painting a lovely picture, aren’t I?). After long days of sun, walking and wrangling a baby, my makeup stayed put, kept oil away and the sunscreen did it’s job…no sunburn!

Disney

And at a suggested retail price of $12.99, this one tube is much cheaper than what I’ve been spending on the separate products, so I am definitely a fan and will be using Garnier BB Cream from now on. Definitely my new favorite beauty product!

Buy:
Find a local retailer


Connect with Garnier:


xoxo
Lynn

Subscribe by email | Like us on Facebook | Follow us on Pinterest | Subscribe on YouTube

Disclaimer: I received this product for free as part of BzzAgent campaign in return for my honest, hype-free opinion. All opinions are my own and I was not compensated in any other way.