Tag Archives: reviews

Cuisinart Baby Food Maker & Bottle Warmer Review & Giveaway

Cuisinart has a fairly new line of baby products. Exciting, right?! The line-up includes a Baby Food Maker & Bottle Warmer, a Baby Bottle Sterilizer and other baby-focused products. We love Cuisinart and have several appliances in our kitchen and I’m sure Brett would have more if we had more counter space.

When Trent turned 6 months old, we immediately started making him baby food at home. We tried a new food every week or so after starting with sweet potatoes…some he liked, some he didn’t (and we are coming to find that we have one picky little eater on our hands!) but we enjoyed making our own baby food. We felt it was much healthier, more nutritious and surprisingly much cheaper than buying jars of baby food.

We also used a bottle warmer to warm up his bottles. It truly was one of the most used baby products in our arsenal.

In order to make the baby food, we would use a steamer pot or the oven, then a chopper (a Cuisinart!). Brett thoroughly researched the existing baby food steamer/chopper appliances on the market and ultimately decided that this was the best way to go. So we went the long route with items we knew would work. It was still a pretty easy process, but when we saw that Cuisinart had a Baby Food Maker & Bottle Warmer in one, we were excited to try it.
Cuisinart Baby-1

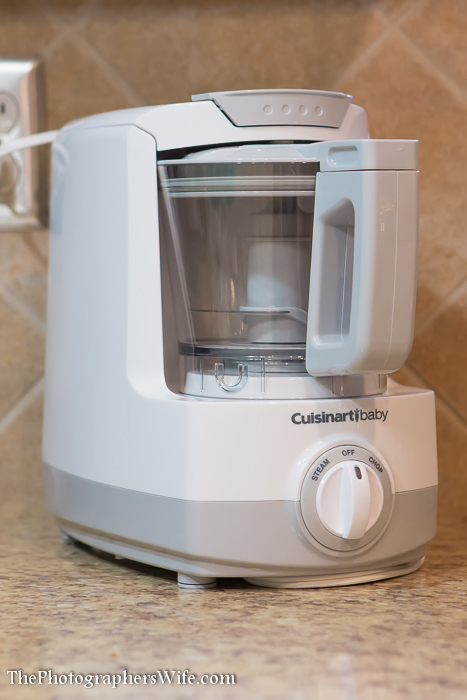
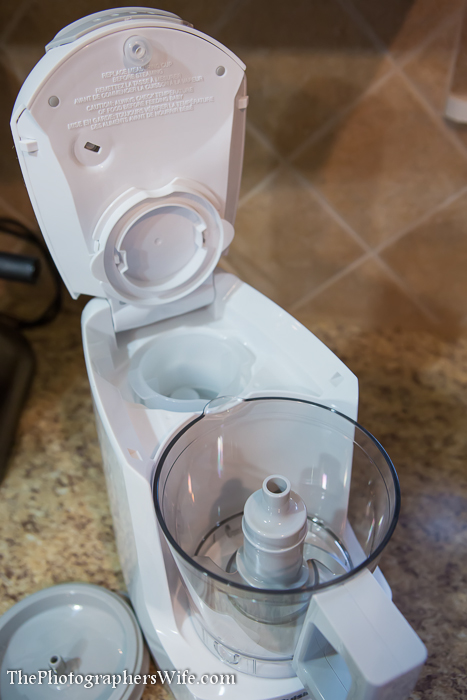
Remember what I said about counter space? This product helps by combining 3 tasks into one product: a bottle warmer, food steamer and food chopper.
Cuisinart Baby-2

From Cuisinart:

The new Cuisinart Baby Food Maker & Bottle Warmer is a fast and easy way for parents to turn the foods they choose into healthy meals for baby – the unit steams and purees in the same bowl. A 4-cup work bowl allows for a significant amount of leftovers, which can go right into the refrigerator or freezer. Additionally, a built-in bottle warmer heats baby’s bottle to just the right temperature.

  • Steam, chop/pureé and bottle warmer functions
  • 4 cup work bowl
  • Patent-pending Bladelock System holds the blade in place while pouring
  • Steam blade creates even steam distribution for quicker, more efficient results
  • Bowl seal to prevent spitting and improve steaming
  • User-friendly dial control with LED indicator light
  • Powerful motor for quick steaming and precise chopping
  • Recipe booklet, spatula, bottle adapter ring and integrated measuring cup included
  • 18-month limited warranty

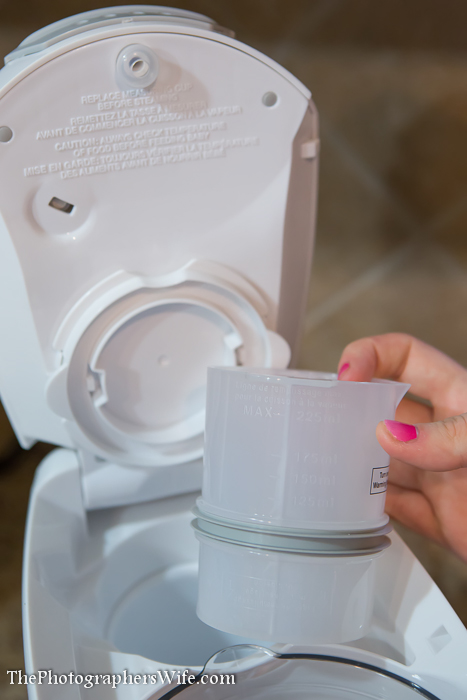
The bottle warmer is located in the back of the unit, which also serves as the water reservoir for steaming food. It comes with a measuring cup to measure the water you’ll need for each task.
Cuisinart Baby-3

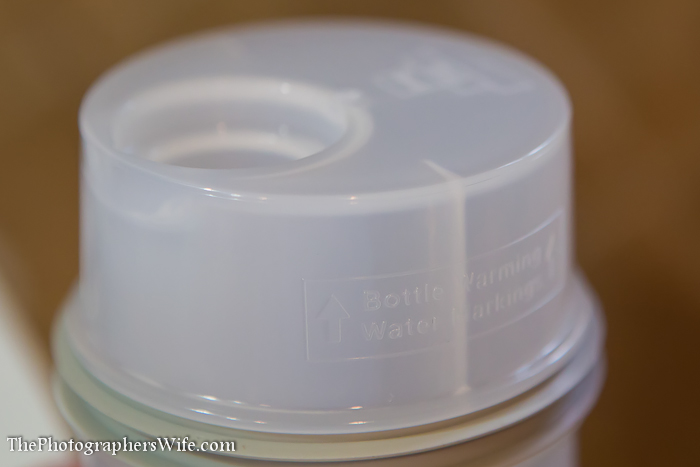
On one side, you can measure for bottle warming…
Cuisinart Baby-4

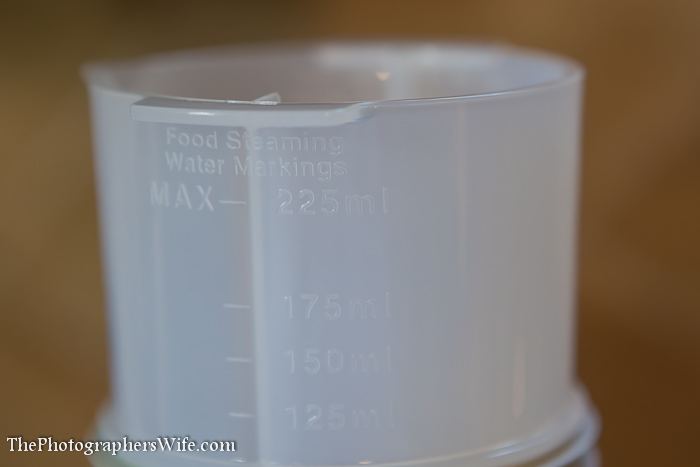
…and the other side measures water for food steaming.
Cuisinart Baby-5

To warm a bottle, simply pour the required amount of water into the reservoir, then place the bottle into the reservoir and turn the dial to steam. The unit will turn off automatically once steaming is complete.

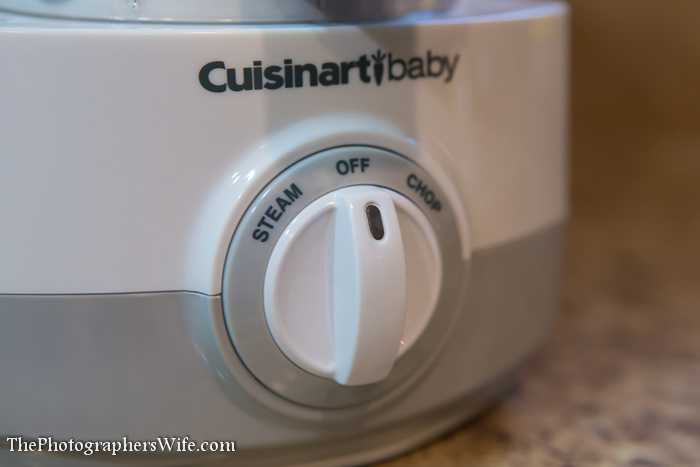
Cuisinart Baby-6 Cuisinart Baby-7

Even though Trent doesn’t really eat baby food purees any longer, we still try to come up with healthier versions of things that we can make on our own. Since he loves ice cream, we decided to make banana ice cream with blueberry sauce.
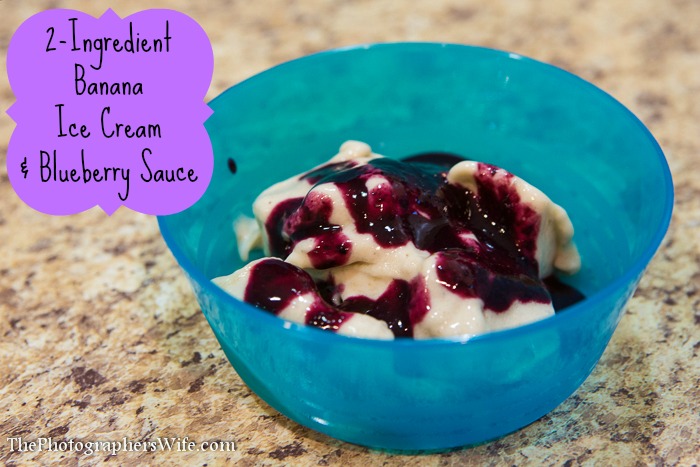
Banana ice cream

This banana ice cream is made of only one ingredient…frozen bananas! We placed 2 very ripe bananas in the freezer…but you could also cut them up and put them in a freezer bag before putting them in the freezer. He also loves blueberries, so adding some blueberry sauce gives it a little more oomph and yumminess. What a great way to sneak in some extra nutrition while he thinks he’s getting a treat!

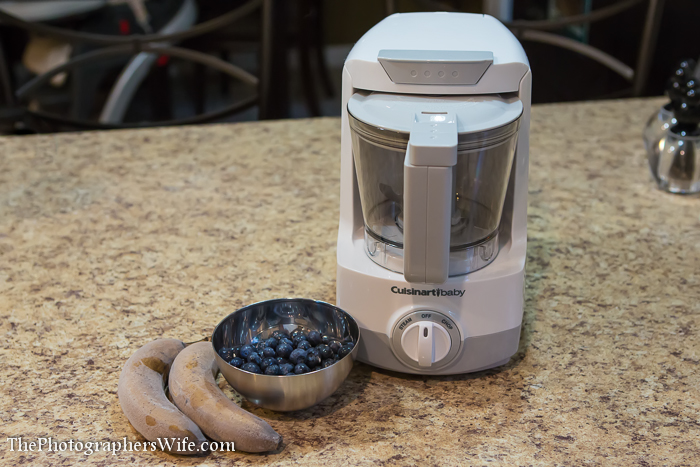
Cuisinart Baby-8 Cuisinart Baby-9

Make the blueberry sauce first by pouring the required amount of water (there is a chart provided with the unit with some guidelines) into the reservoir.
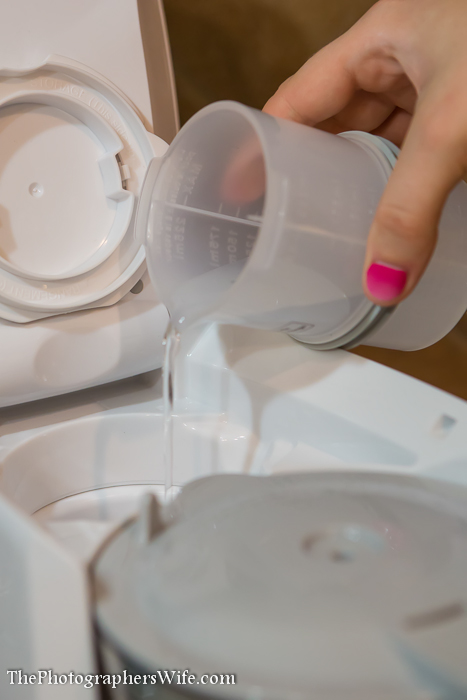
Cuisinart Baby-12

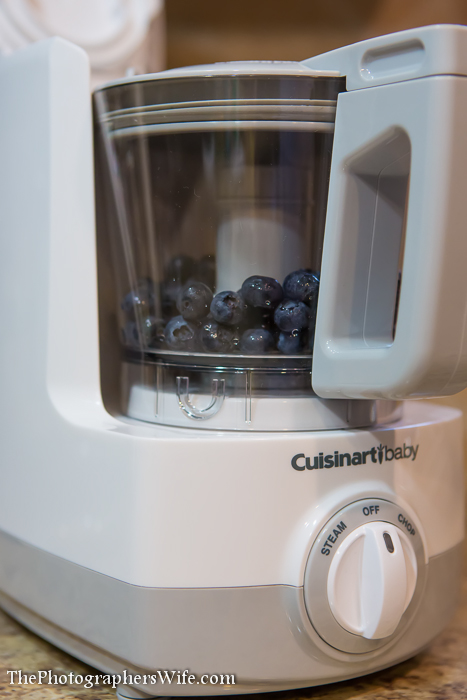
Then pour the blueberries into the steam/chop bowl and close the lid and the top of the unit.

Cuisinart Baby-10 Cuisinart Baby-11

Cuisinart Baby-13

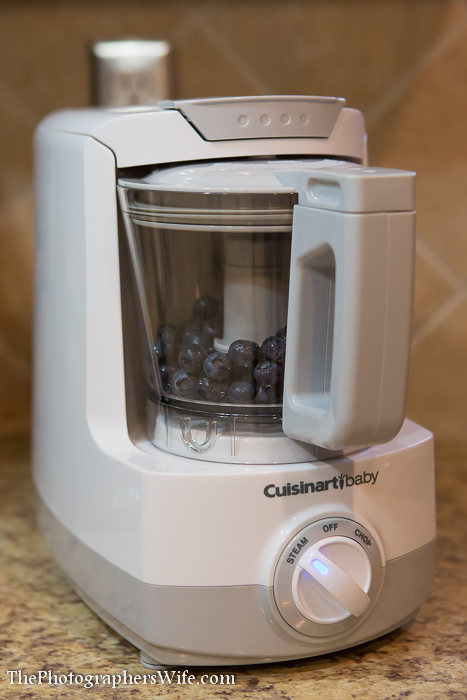
Turn the dial to Steam. The light will turn on and you will see the steam accumulating in the bowl.
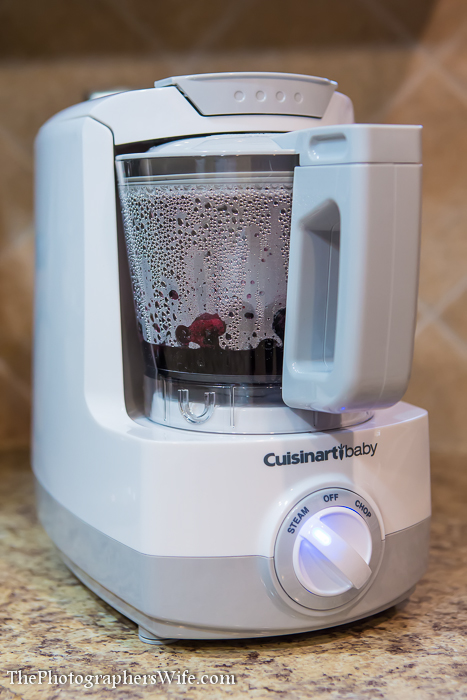
Cuisinart Baby-14

The light will turn off once the steaming is complete. Then simply turn the dial to Chop as many times as needed to reach the desired consistency. You can do quick chops or long continuous chops.
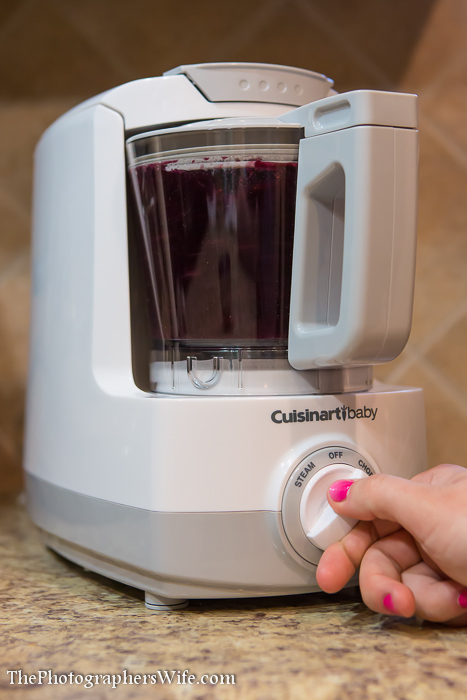
Cuisinart Baby-15

Pour the blueberry sauce into a bowl and set aside while you make the banana ice cream.
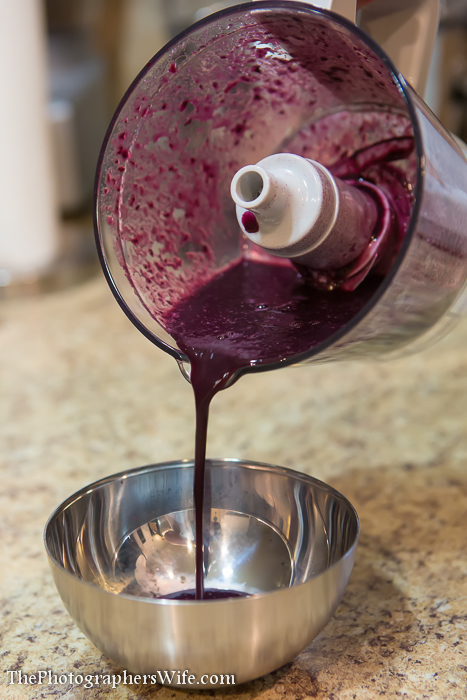
Cuisinart Baby-16

Clean out the bowl, then put your frozen banana pieces into the bowl, cover the bowl and close the unit.
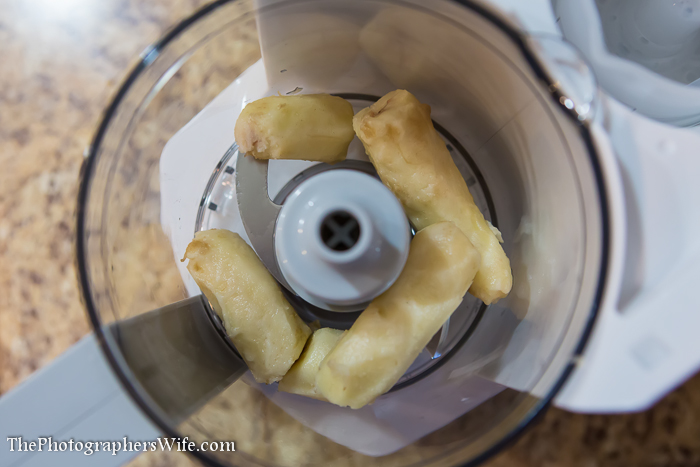
Cuisinart Baby-17

Turn the dial to Chop as needed until the bananas reach the consistency of ice cream.
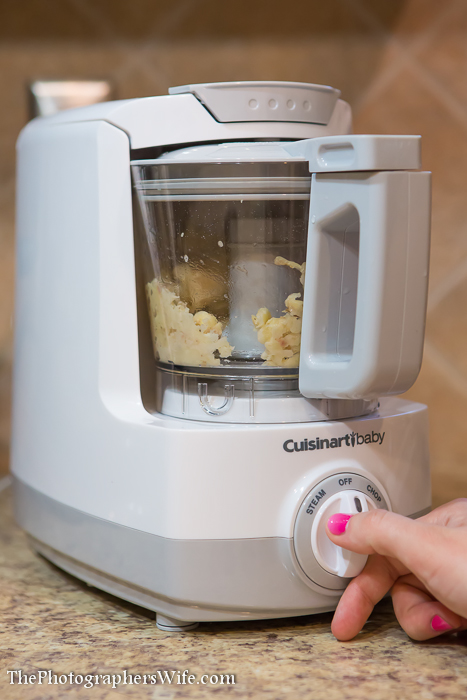
Cuisinart Baby-18

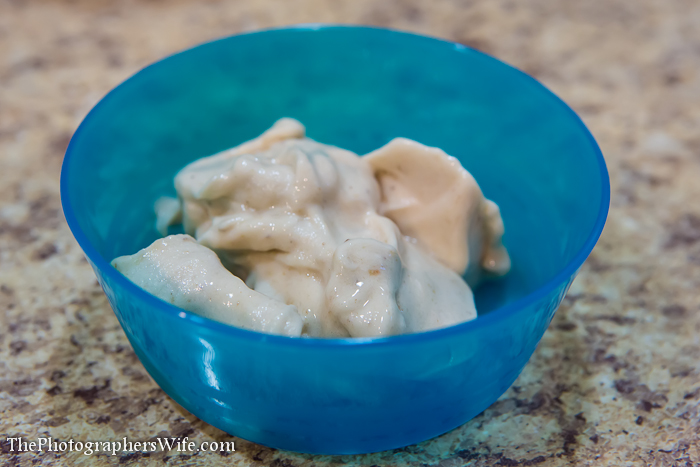
Scoop out the ice cream using the provided spatula.

Cuisinart Baby-19 Cuisinart Baby-20

Top your ice cream with the blueberry sauce and enjoy!

Cuisinart Baby-22 Cuisinart Baby-23 Cuisinart Baby-24

This would also be great to steam and chop healthy snacks for yourself. Want more baby food ideas? Check out the Cuisinart Baby website, where you can find recipes for different stages your baby is in, contests to enter, blog posts and other baby tools and ideas.

Where to buy:
Amazon
These online retailers
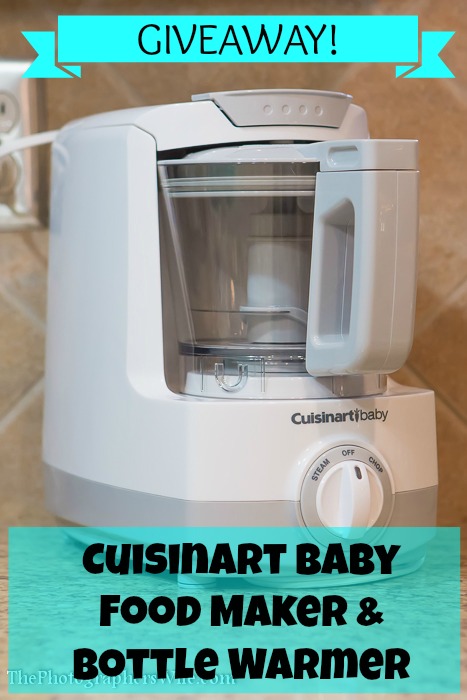
Cuisinart Giveaway

Giveaway!

Up for grabs: A Cuisinart Baby Food Maker & Bottle Warmer (a $129 value!)

How to enter: We’ll be using Rafflecopter for this one, so there are multiple ways to enter…pick one or pick them all!

This giveaway ends on Sunday, August 4, 2025 at 11:59 pm EST. US only please. I will contact the winner the next day by email and will announce the winner as an update to this blog post. Good luck!

{If you are viewing this post in an email or RSS feed, please click over to the blog to enter the contest using the Rafflecopter form :) }

a Rafflecopter giveaway

xoxo
Lynn

Subscribe by email | Like us on Facebook | Follow us on Pinterest | Subscribe on YouTube


I was given this product in exchange for a review and giveaway. All opinions are my own and 100% honest.

Jamberry Nails Wraps (Shields) Review & Giveaway

Well, the word is out and I might as well contact Witness Protection…

I have terrible nails. I’m trying to be better, I promise. After the last time I mentioned my nails, which was the 2nd time on the blog, a lovely reader, Sarah Ivie, contacted me to tell me that she too had once been really bad about her nails and that she no longer has a problem after trying Jamberry nail wraps. In fact, she loved them so much that she became a consultant! She offered to let me try them to see if I liked them. I was so excited…I’m willing to try anything to break my habit.

Jamberry Nail Shields, Nail Wraps - Buy Jamberry Nails

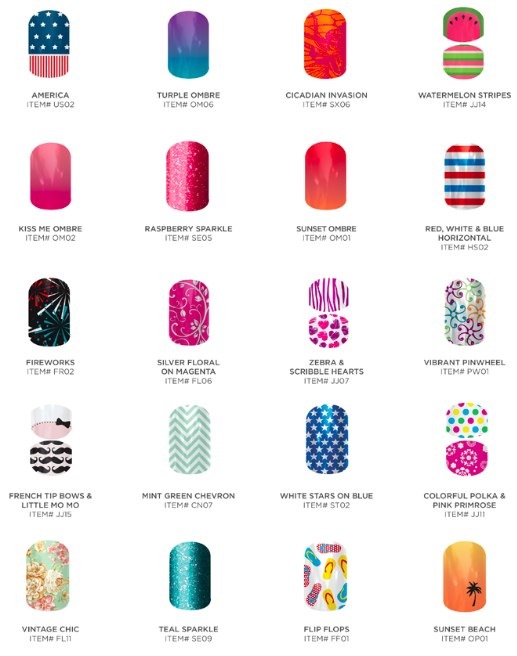
The first step? Picking out a design from their huge catalog of designs! They have almost every color and design you can imagine and they apparently are always adding more. Check out some of their current popular designs…so fun!

Top 20 Trends_0613 a.png

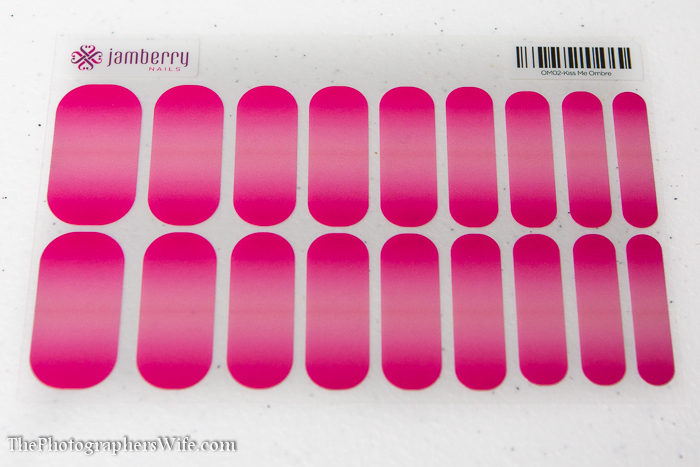
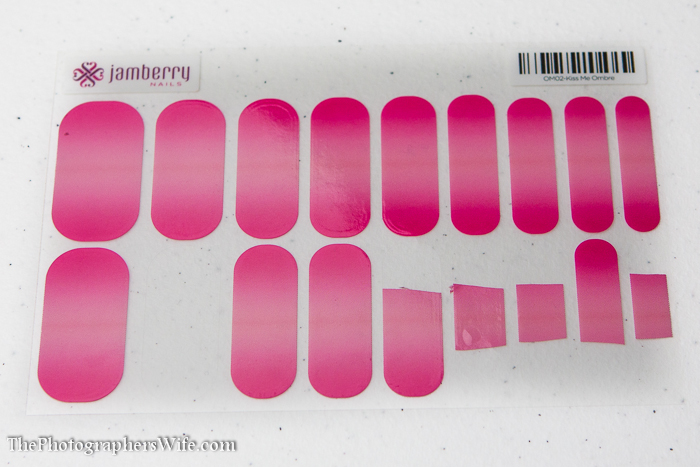
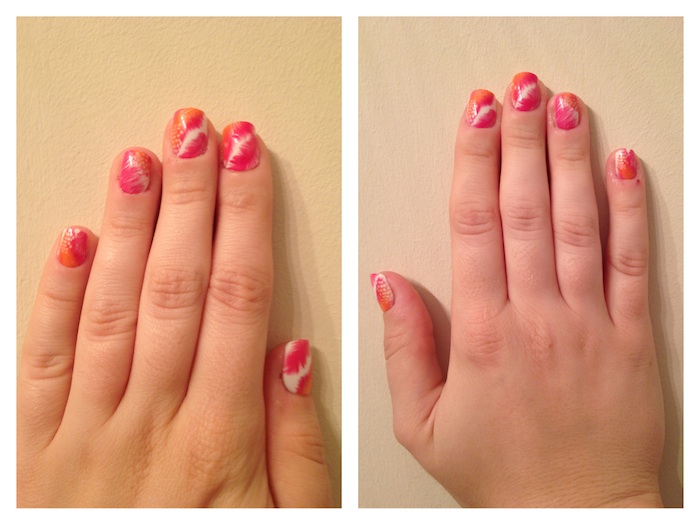
I finally settled on Kiss Me Ombre, a hot pink ombre design. Perfect for summer.

Jamberry Nail Shields, Nail Wraps - Buy Jamberry Nails-1

I received the nail wrap sheet along with a cuticle stick, alcohol pads, a nail file and some information on the company, including party-hosting benefits and how to become a consultant.

Jamberry Nails-1 Jamberry Nails-2 Jamberry Nails-3

I was going to make a video on applying them, but Sarah sent me the official Jamberry video with complete instructions on how to apply them, so I figured why not just share that? Here it is:

So, when Trent was napping in his crib, the countdown was on. He usually never sleeps more than 1-1.25 hours in his crib, so I had to learn how to do it and then get to it in that amount of time.

I used a blowdryer as my heat source, but Jamberry also offers a mini-heater. I gathered all my materials, sat down and got started just like the video instructed. I had my blowdryer next to me, so I could simply press the button on and off when I needed to without actually picking it up. Their instructions say to heat the wrap for 10-15 seconds before applying, but I found that my blowdryer was hot enough to only need 3-5 seconds.

I was definitely a little clumsy at first, but I got better and better with each nail. That is, until I had to do my right hand using my left hand. This pin describes me completely when polishing my nails…

Pinterest

It was much more difficult trying to cut the nail wraps using my left hand. I was using a fairly old pair of scissors, so I definitely recommend using a new pair of sharp scissors. The wraps definitely looked better than if I would have polished them, lol.

I must have small fingernails too, because I mostly used the smallest nail wraps. But because my nails are so short, I think I may get an extra use out of my sheet and perhaps even use the larger wraps for a pedicure. This was what was left after one use.

Jamberry Nails-4

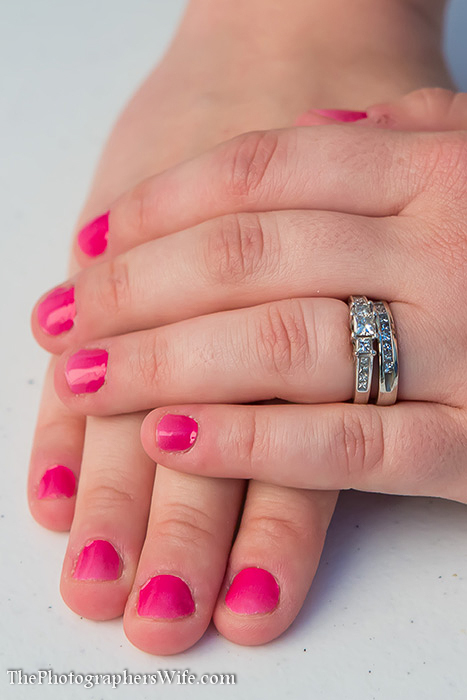
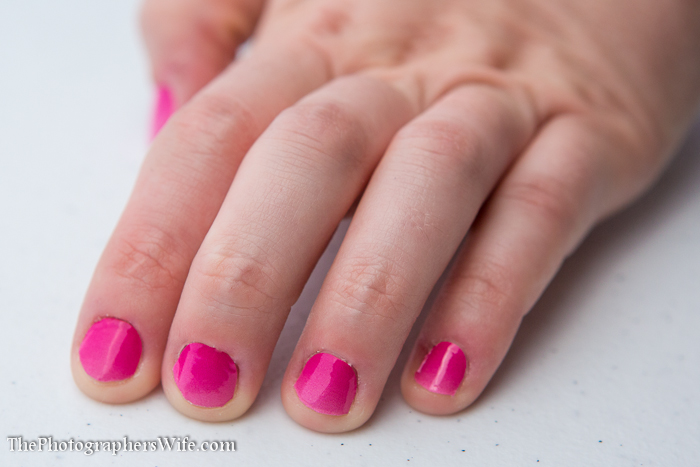
I took a shower right after I was finished and while I was worried it would mess my nails up, they weren’t affected one bit! In fact, it has now been a full week of showers, baths for Trent, pickup up toys, doing dishes, typing, picking up toys again and they are still going strong.

Jamberry Nails-8

Before using these myself, I did consult my Google consultant for other reviews on the product. I saw a few people complain and even show photos of how jagged their nails looked. I think maybe they weren’t applying them properly because I have no jagged areas. The biggest difference is making sure your file your nails downward and not side to side. The only issue I had was I cut one wrap too short after putting it on. Since my nails are shorter than my fingers, cutting them wasn’t as easy as someone with long nails who can see the end of the nail while cutting. I kind of had to guess in some spots.

Jamberry Nails-7

Since they are still on, it may be a little too early to exclaim that I’ve kicked my biting habit to the curb, but I am so thrilled with how these are working so far. I have had them on for 7 days and I have yet to try to bite my nails or cuticles. I think it’s a combination of not being able to because the wraps are covering them and because I like looking at how nice my nails can look. I’ve been applying hand and cuticle lotion to improve my cuticles, since they need some major help too. They were fairly easy to apply (took me about 30 minutes my first time and I expect it will be faster next time, since I know what I’m doing now) and I can have cute designs, which let’s face it, would be nearly impossible to try to do on my own (see Pin above). I’m looking forward to also buying cute polishes to go along with the designs.

Warm water or acetone is recommended for removal. Some people also use warm olive oil.


***Update***

Well, these lasted the entire 2 weeks! I probably could have made them last several days more, but there was 1 spot that was peeling up a little bit and I just couldn’t wait to see how my nails looked underneath. I am so proud that I now have white tips on each of my nails, my cuticles have never looked better and it’s been 3 days since I took the Jamberry wraps off and I still haven’t bitten my nails…so it’s been 2.5 weeks of no biting! They were easy to remove - I just peeled them off and then used acetone to rub off the remaining sticky residue. I’ll probably put on another set of wraps this weekend to get another 2 weeks ahead on my quest to no more biting! :)


Recommended for: I recommend these for anyone that likes trying different designs on their nails, or need that initial measure to stop biting their nails.

Buy: Check out Sarah’s Jamberry site!

Connect: Sarah’s Jamberry Facebook page

Thinking about hosting a party or signing up as a consultant to earn some extra money? Check out this amazing July offer!

The July special includes a $50 rebate (off of the $99 consultant kit) for anyone signing up as a consultant with Jamberry in the month of July if they meet Jamberry’s First Month Fast Start qualifications, which include: Holding 1 party, Reaching $500 in overall sales and recruiting one person to your team. You will have the remainder of July and all of August to reach these qualifications. In addition, if you want to host a party (we can do one online/Facebook or catalog), and it totals $400 in sales, you also get a $50 credit on the consultant kit. This combination would make the kit free! You can contact Sarah via Facebook or email ([email protected]) if you would like additional information on hosting a party or joining her team (or both :) ). You can host a party through her via her website, even if you are not local to her!

Sarah Ivie - Independent Consultant
http://www.sarahivie.jamberrynails.net
email: [email protected]
Sarah’s Jamberry Facebook page


Sarah is so awesome that she is also offering a free sheet of Jamberry nail wraps to one lucky reader!

jamberry  giveaway

Giveaway!

Up for grabs: 1 sheet of Jamberry Nails wraps (a $15 value!) - Winner’s choice of design!

How to enter: We’ll be using Rafflecopter for this one, so there are multiple ways to enter…pick one or pick them all!

This giveaway ends on Saturday, August 3, 2025 at 11:59 pm EST. This contest is open to US residents only. I will contact the winner the next day by email and will announce the winner as an update to this blog post. Good luck!

{If you are viewing this post in an email or RSS feed, please click over to the blog to enter the contest using the Rafflecopter form :) }

a Rafflecopter giveaway

xoxo
Lynn

Subscribe by email | Like us on Facebook | Follow us on Pinterest | Subscribe on YouTube


I was given this product in exchange for a review and giveaway. All opinions are my own and 100% honest.
Nuby Bottle Drying Rack Review

Being a working mom, I pumped for a year and Trent drank from a bottle 3 times a day. Between washing the pump parts, bottles and various bottle parts each day, we always had something to wash or something to dry…it was exhausting! In fact, we had to clean out an entire shelf in one of our cabinets for bottles and everything…just to dry! Several months ago, we were on the lookout for ways to better utilize the bottle drying space to fit more stuff, especially after he also started using cups, so we started using the Nuby Bottle Drying Rack.

Nuby Bottle Drying Rack-1

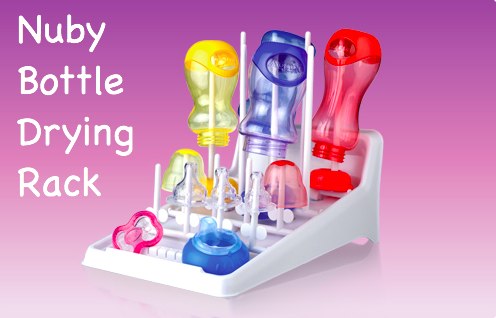
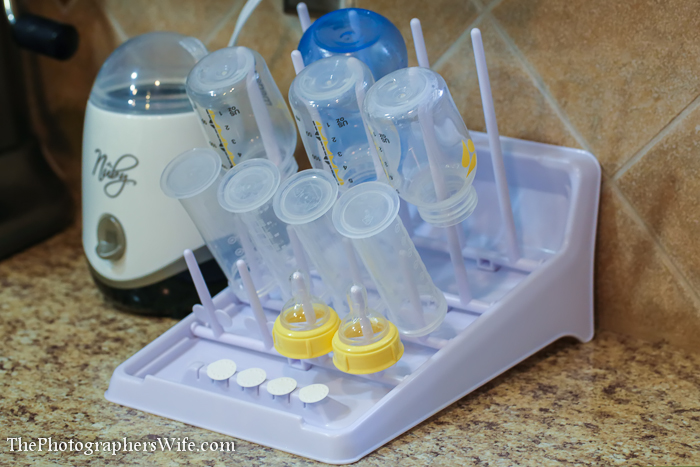
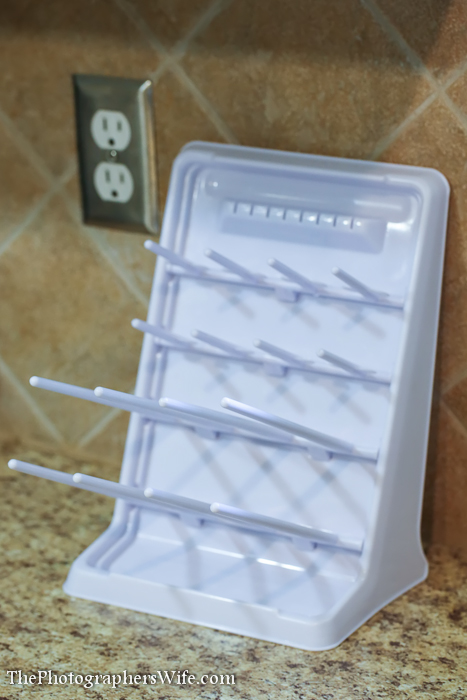
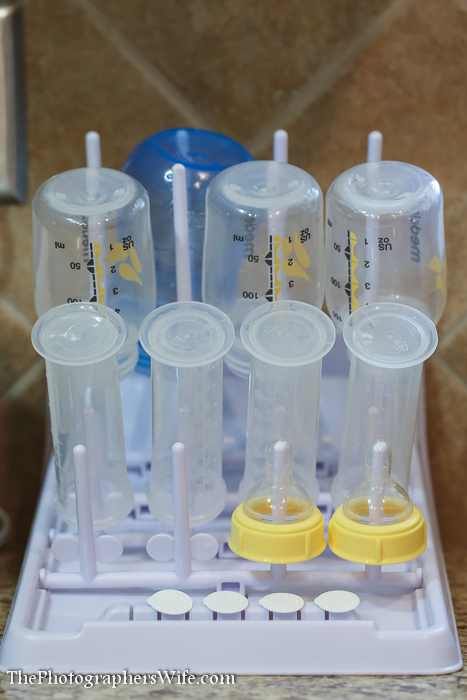
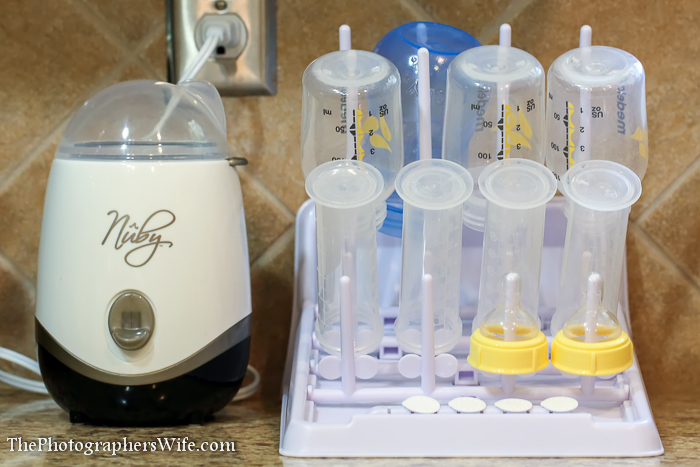
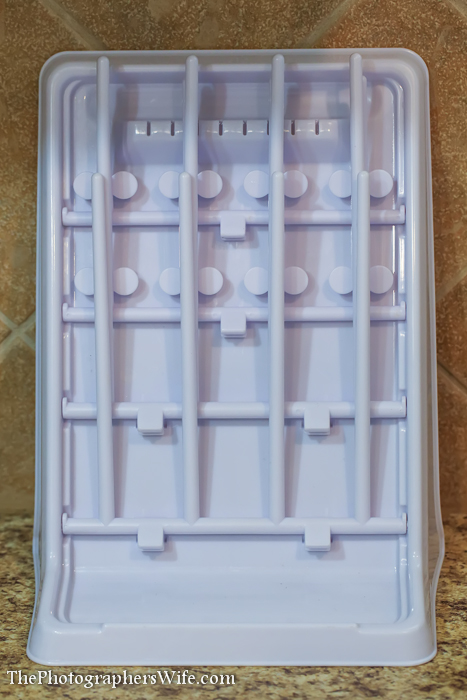
This Nûby™ Drying Rack holds up to eight bottles, as well as nipples, rings, discs and caps. It is also ideal for pacifiers and training cups. It comes pre-assembled. The sturdy drying posts securely lock into place for drying and fold down easily for storage. Just place on any flat surface, as the built-in reservoir holds the excess water for easy draining.

Nuby Drying Rack-2

What I like about this drying rack is that you can place it either horizontally or vertically to fit the space you have.

Nuby Drying Rack-4 Nuby Drying Rack-5

It allows air to circulate in the items, so they dry faster and don’t sit in water. And it works with more than just bottles, like pump parts, his Flip-It cup, and other cups and small items.

Nuby Drying Rack-3

Even though we used it in one of our cabinets, it also would have been great on the counter by the sink and Nuby Bottle Warmer!

Nuby Drying Rack-1

You can also fold it up to create more space when not using it.

Nuby Drying Rack-6

I could see this being used for more items after we no longer need to dry bottles…perhaps craft items, ribbon or tape!

Buy:

Amazon

Connect:

www.facebook.com/nubyusa
www.twitter.com/nubyusa
www.pinterest.com/nubyusa
www.instagram.com/nubyusa
If you enjoyed this post, check out my other Nuby reviews here!
xoxo
Lynn

Subscribe by email | Like us on Facebook | Follow us on Pinterest | Subscribe on YouTube


I did not receive any compensation for this post, although as part of this program I received items to sample or review. As always, all opinions are my own and 100% honest.

Picture Keeper Review & Giveaway

I end up with a lot of photos and videos on my laptop from both Brett and my phone. I don’t necessarily need all of them for anything in particular, but I would never ever delete them. They are a chronicle of our lives.

Just recently, I was making a video on iMovie and up popped a message telling me I couldn’t add more to the video without clearing space. Dang. The end was near…

Apparently, after over a year of adding, adding, adding, the time had come that I was running out of space. I plugged in an external hard drive and began going through every single folder and moving over photos, video and any documents that I wanted to keep but didn’t need on the laptop. Since then, whenever I’m making a video or post and I think of an older photo I need to use, I have to find the external hard drive to plug in and then go through all the documents I transferred several months ago to find what I need. Every time I have to do that, I wonder if there’s a better way.

Enter the Picture Keeper.

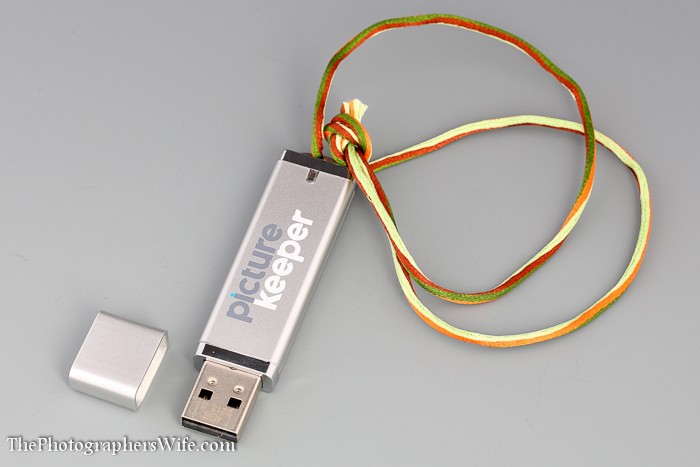
Picture Keeper-1

Picture Keeper-2

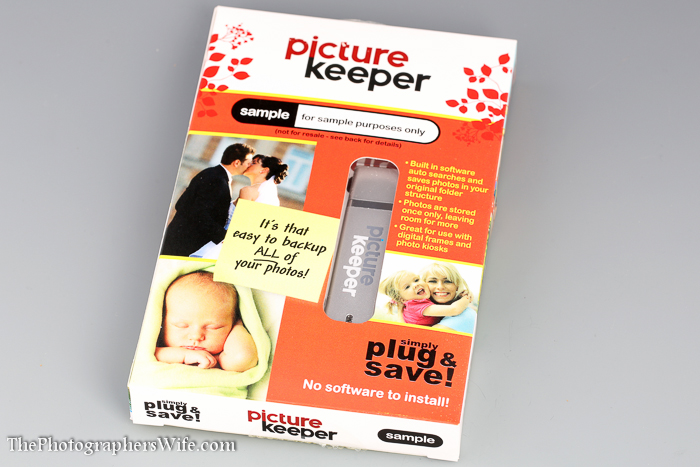
Keep your pictures safe with this easy-to-use backup device. Just plug it in and it finds your pictures for you! It’s perfect for sharing and preserving your favourite memories

The Picture Keeper Difference

  • No software to install, wires to connect, passwords to remember, or monthly fees.
  • Use on multiple computers; both PC and Mac compatible.
  • Once one Picture Keeper fills, just use another and the second will continue where the first left off. Amazing!
  • Can backup videos too!
  • Works well with all photo organizing softwares like Kodak Easy Share, Picasa, etc.
  • Easily use with your digital photo frame, favorite print kiosk or keep in a fire proof safe.

Picture Keeper-3

Wow - this would have been much easier and more convenient! Even though I JUST cleaned my computer of all photos and video recently, I already had several folders of photos that I could back up.

Here is how I used the Picture Keeper.

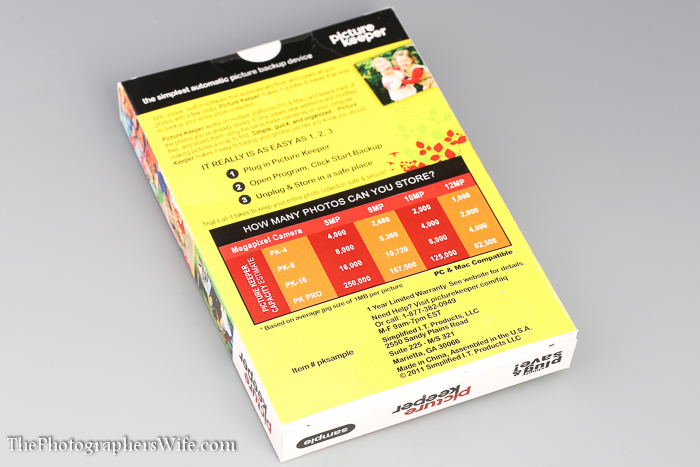
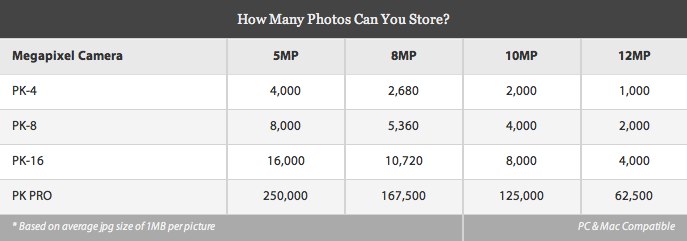
The Picture Keeper can give you peace of mind by backing up your memory-filled, priceless photos and giving you an easy storage solution. As far as photographers go, it is so important to keep your client’s photos for a certain amount of time, which can lead to needing massive amounts of storage. Picture Keeper offers several product options, from PK4 to the PKPRO, depending on your storage needs. Unfortunately, the graph they provide on their website only goes up to the storage capacity of photos from a 12 megapixel camera…which is no where near Brett’s 22.3 megapixel camera, so you’ll have less storage space if you have a high megapixel camera, obviously.

PK4

Another great thing about the Picture Keeper is that if you fill up one Picture Keeper, you can insert another one and it will pick up where the last one left off! You can also keep using the same Picture Keeper and it will remember what has already been backed up and will only back up anything that has been added since the last backup.

I personally like this because it is a small USB that I can keep nearby for easy access. It’s portable, so I can put it in my bag or keep it near my laptop wherever it goes, as opposed to the external drive I was using. There’s no wires or separate software to worry about. I am really bad about backing up my stuff and the Picture Keeper will help me be better about it. I would never want to lose photos of my family. Or of Disney food. But mostly family. Mostly.

Picture Keeper-3.jpg

Giveaway!

Up for grabs: A Picture Keeper PK4 (a $29.99 value!).

How to enter: We’ll be using Rafflecopter for this one, so there are multiple ways to enter…pick one or pick them all!

This giveaway ends on Sunday, July 21, 2025 at 11:59 pm EST. This contest is open to US and Canada residents. I will contact the winner the next day by email and will announce the winner as an update to this blog post. Good luck!

{If you are viewing this post in an email or RSS feed, please click over to the blog to enter the contest using the Rafflecopter form :) }

a Rafflecopter giveaway


xoxo
Lynn

Subscribe by email | Like us on Facebook | Follow us on Pinterest | Subscribe on YouTube


I was given this product in exchange for a review and giveaway. All opinions are my own and 100% honest.

imPress Press-On Manicure by Broadway Nails Review

I joined influenster recently and quickly received my first box of items to experience and spread the word.

voxbox-blogimage-popup2

Vox Box

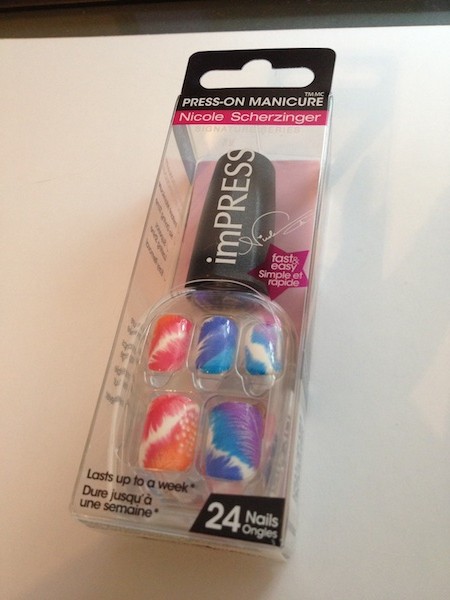
Out of all the contents in the box, there was one item I was iffy about trying…the imPRESS Press-on Manicure by Broadway Nails.

imPress Review

On one hand (no pun intended), my nails are a wreck. I’ve said it before and even shared an awful photo of them. I’m a biter…not just of the nails, but the cuticles too. It’s so embarrassing. I thought maybe these would be good to help my nails look better.

On the other hand (ok maybe I am intentionally punning around), this design was loud. I don’t ever wear color on my nails because it would draw attention to how terrible they look, so these were quite bold and different than what I’m used to. I also never hear too much about press-on nails. Are they good? Are they worth it? Can you tell they are fake? Do they last?

I decided to step outside of my comfort zone and go for it. I figured I would just paint over them with a more subtle nail polish color once they were on. Since they are supposed to last for up to a week, my hope was that that would be long enough to leave my nails alone to give them a head start on growing a little and looking better without me gnawing on them and then maybe I wouldn’t want to ruin the progress once the press-on nails were off.

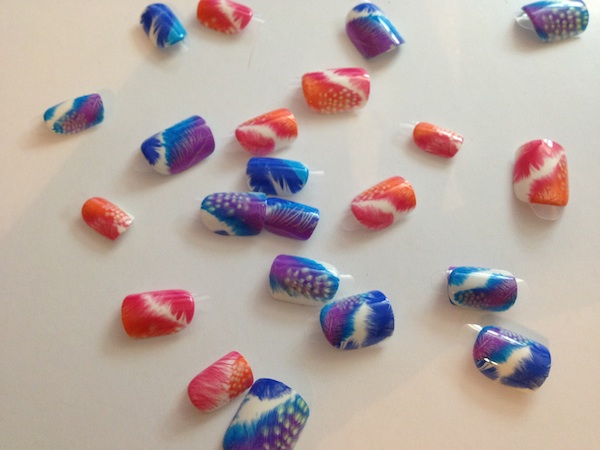
The first step was to lay out all the nails…

imPress Review 2

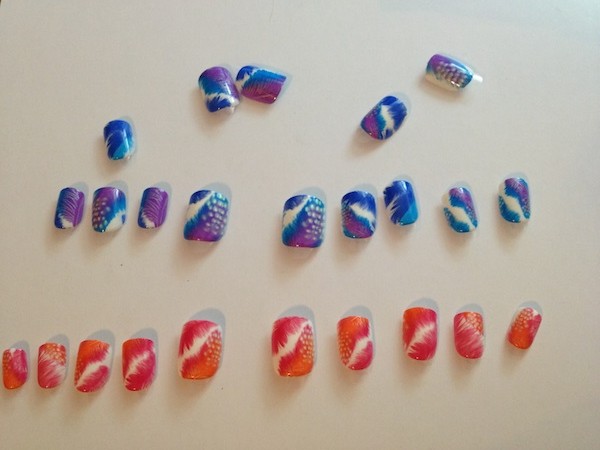
…then match up the sizes to your nails and lay the ones you will use out in order.

imPress Review 3

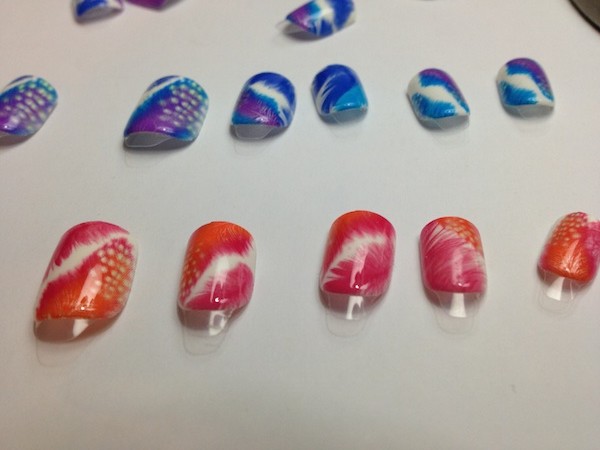
Up until this point, I wasn’t sure which color I would pick, so I went through all of them to see what I was working with. I didn’t quite understand their thought process when creating what would be included in the package. It comes with 24 nails with 2 different color schemes. I got exactly 10 pink nails, so there was no flexibility when it came to sizes and no replacements if one fell off or broke. The rest (14) were purple/blue, but the sizes were different. I couldn’t find any to fit my pinkies and some of them just didn’t line up right, so I couldn’t use those.

Pink it is!

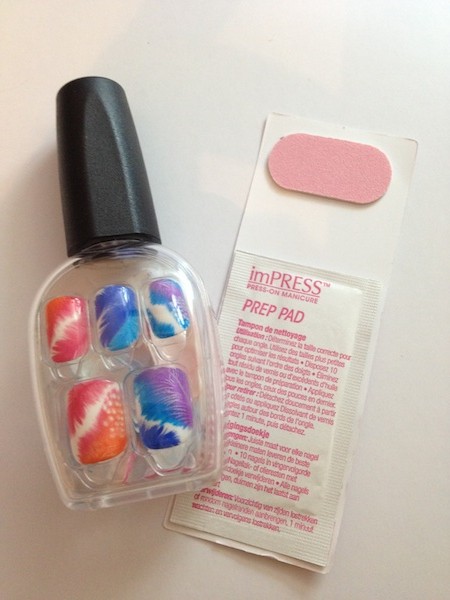
Next, I used the included prep pad to clean my nails. This is to remove any excess dirt and oil. I didn’t already have polish on, but if I did I would have removed it first with polish remover. I also already filed my nails , but they include a mini file to smooth out your nail area and to tidy up your nails once they are on.

imPress Review 1

Each nail has a pull tab to remove to uncover the adhesive that’s already. That was the nice thing about these, no extra pieces or glue to fumble with. But it was difficult to remove the tab on a few of the nails, I even warped one of them trying to pull it off.

imPress Review 4

Once the tab is removed, just line up the nail how you will want it, place it on your nail and press down firmly. I wanted these babies to stick good, so I pressed down HARD.

I recommend you save the last 2 nails for the 2 fingers you use to peel the tabs back, or else it might mess up your nails and be extremely difficult to pull the tabs. There was no drying time and I even gave Trent a bath immediately after putting them on.

imPress Review 5

As for the color, I never painted over them because once they were on, they didn’t look so loud and bold. In fact, a few people noticed and said they liked them and that they were “Summery”.

Some other random thoughts:

I don’t know how people with long nails do it. I know I still needed to get used to them, but dang I had the hardest time zipping up my jeans and opening my soda. You don’t even want me to tell you how many things I misspelled on my phone and computer.

It made me think about my nails 24/7…I was consciously thinking about them so I wouldn’t ruin them and I kept looking at them, longing that my natural nails would grow nice and that I could be one of those people that takes polish photos to share on Pinterest. Honestly, I’ve shied away from doing certain product review videos because I didn’t want my nails in the video. I hope this helps because I have started doing more videos and want to do even more.

I really like how these press-on nails give you the look of nice long nails without damaging your natural nails like acrylics. They were the perfect length for me, too. I did a search to see some of the other colors available and they do have some great options. I would have liked to try the French manicure or a single color, but hey, I’m willing to step outside the box.

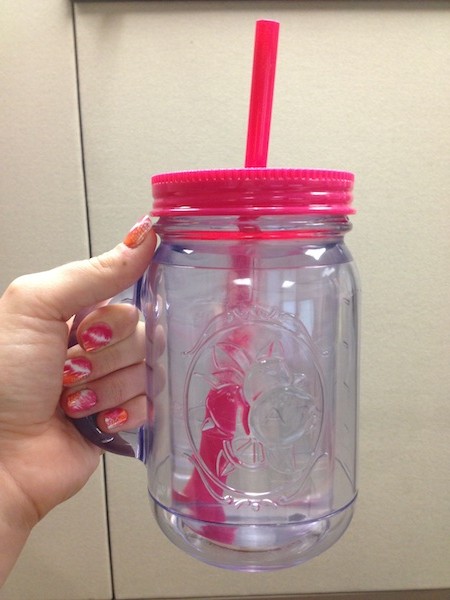
Plus, they match my Mason jar/tumbler!

imPress Review 6

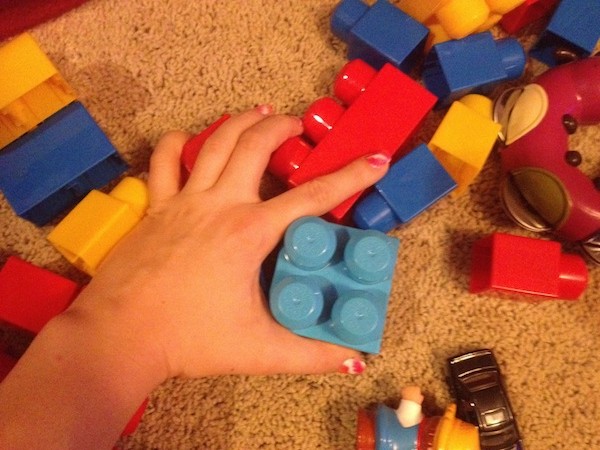
I would recommend these if you have an event you want nice nails for, but not for long-term use. Mine lasted 2 days…but only 2 had actually fallen off after I banged them on something and the rest I took off so it didn’t look weird. I was also pretty rough on them. I had to wrangle a baby, banged them when I pumped gas, reorganized a closet and boxes and even picked up toys…multiple times.

imPress Review 7

I think they would have lasted longer if I was a little more careful. I would have liked to try the French manicure or some of the other colors. They have several colors/designs to choose from, so you can be adventurous without a long-term commitment!

At $5.99-7.99, they are a little more than what I would expect to pay for something that only lasts up to a week, but it’s much cheaper than going to the salon.

Visit their website to find a retailer near you (and get a $1 off coupon!)

Connect with Broadway Nails

Facebook
Twitter
YouTube
Pinterest


xoxo
Lynn

Subscribe by email | Like us on Facebook | Follow us on Pinterest | Subscribe on YouTube