 The Photographer's Wife Parenting, Disney, Travel, Reviews & Other Randomness

Tag Archives: pregnancy
38 Weeks
How’s that for a nice hiney shot?
Poor little guy is probably so cramped in there. Right now he has the hiccups, which he gets at least once a day, and that is good because it means he is practicing his breathing and preparing for life outside the womb!
I am so happy to say that we’ve made it to June!
This is the month I will become a mom and Brett will become a dad. Ok, yes we have fur children, and believe me, they are a handful, but that’s not the same. And even though you never know what could happen, more than likely this is THE month. June usually has quite a bit going on for us because Brett thinks he gets to celebrate his birthday all month, instead of just one or two days like the rest of us. Then there is also Father’s Day usually within a few days of Brett’s birthday. Now, we will also have Trent’s birthday….his due date is Friday, June 15, Brett’s birthday is the next day and Father’s Day is the day after that. YIKES! Brett is not so secretly hoping for Trent to have the same birthday as him so they can have a SUPER birthday. What is a SUPER birthday? I’m scared to find out haha!
As a couple without kids, we typically don’t take our vacations during the summer. It’s too darn hot out, everything is more expensive and there are a bazillion kids everywhere because of school being out. The one thing that constrained us in recent years was my college schedule. We had to go when I had a break, or if the timing was better another time, I would just take off from school. No big deal, do the work ahead of time. Now we really don’t have any constraints and we love it. But it’s weird to think ahead to when our kids will be in school and in fact, we have already decided we are ok with taking the kids out of school for our vacations if it makes for a much more enjoyable time for everyone. A week off is more than doable to make up work and not fall behind, in our opinion.
If he sticks to the plan, in just 2 weeks we will get to meet him. 
Nursery Closet Makeover
The closet in our nursery was kinda…well…blah. Only one long shelf and hanging rod across the back wall and some small shelves on the side. We took the opportunity to give it a makeover while creating our Colorful Nursery for Trent.

The first step was to remove the long shelf and hanging rod.

We then painted the wall the same color as the rest of the nursery, Benjamin Moore Gray Horse.

We kept the small side shelves since they’ll provide extra storage room without getting the way.

We also added a light fixture. A sleeker light fixture from IKEA.


We purchased the IKEA Expedit 5×1 shelf in white and placed it upright in the center of the closet and nailed it to the wall.

Brett installed another long shelf above the center IKEA shelf. He then took two long white metal rods, cut them in half and inserted two on each side of the center IKEA shelf.

We added some bins to the center IKEA shelf and a shoe insert to the bottom.

Before Brett could say “Ta-Da!” I filled it with diapers and lots of clothes!

Waaay more storage space and more room for clothes!
Be sure to check out our other DIY Projects from Trent’s Nursery!
DIY Jumbo Hanging Barrel of Monkeys
The Photographer’s Wife fans, be sure to:
Subscribe to our posts
Follow us on Twitter
DIY Pirate Nursery Door Sign
After our Colorful Nursery was finished, we felt there was still something needed to complete our son’s room.
He needed a door sign so everyone know’s whose awesome room it is!
This project was super easy and took less than 30 minutes…my kinda project!
Supplies:
Wooden plaque
Small wooden letters
Black acrylic paint (or any color to paint the letters)
2 pre-made wooden cut outs (we chose a pirate hat and pirate ship)
Paintbrush
Hot glue gun
Double-sided heavy duty adhesive tape
All items were from Hobby Lobby for less than $8 total!
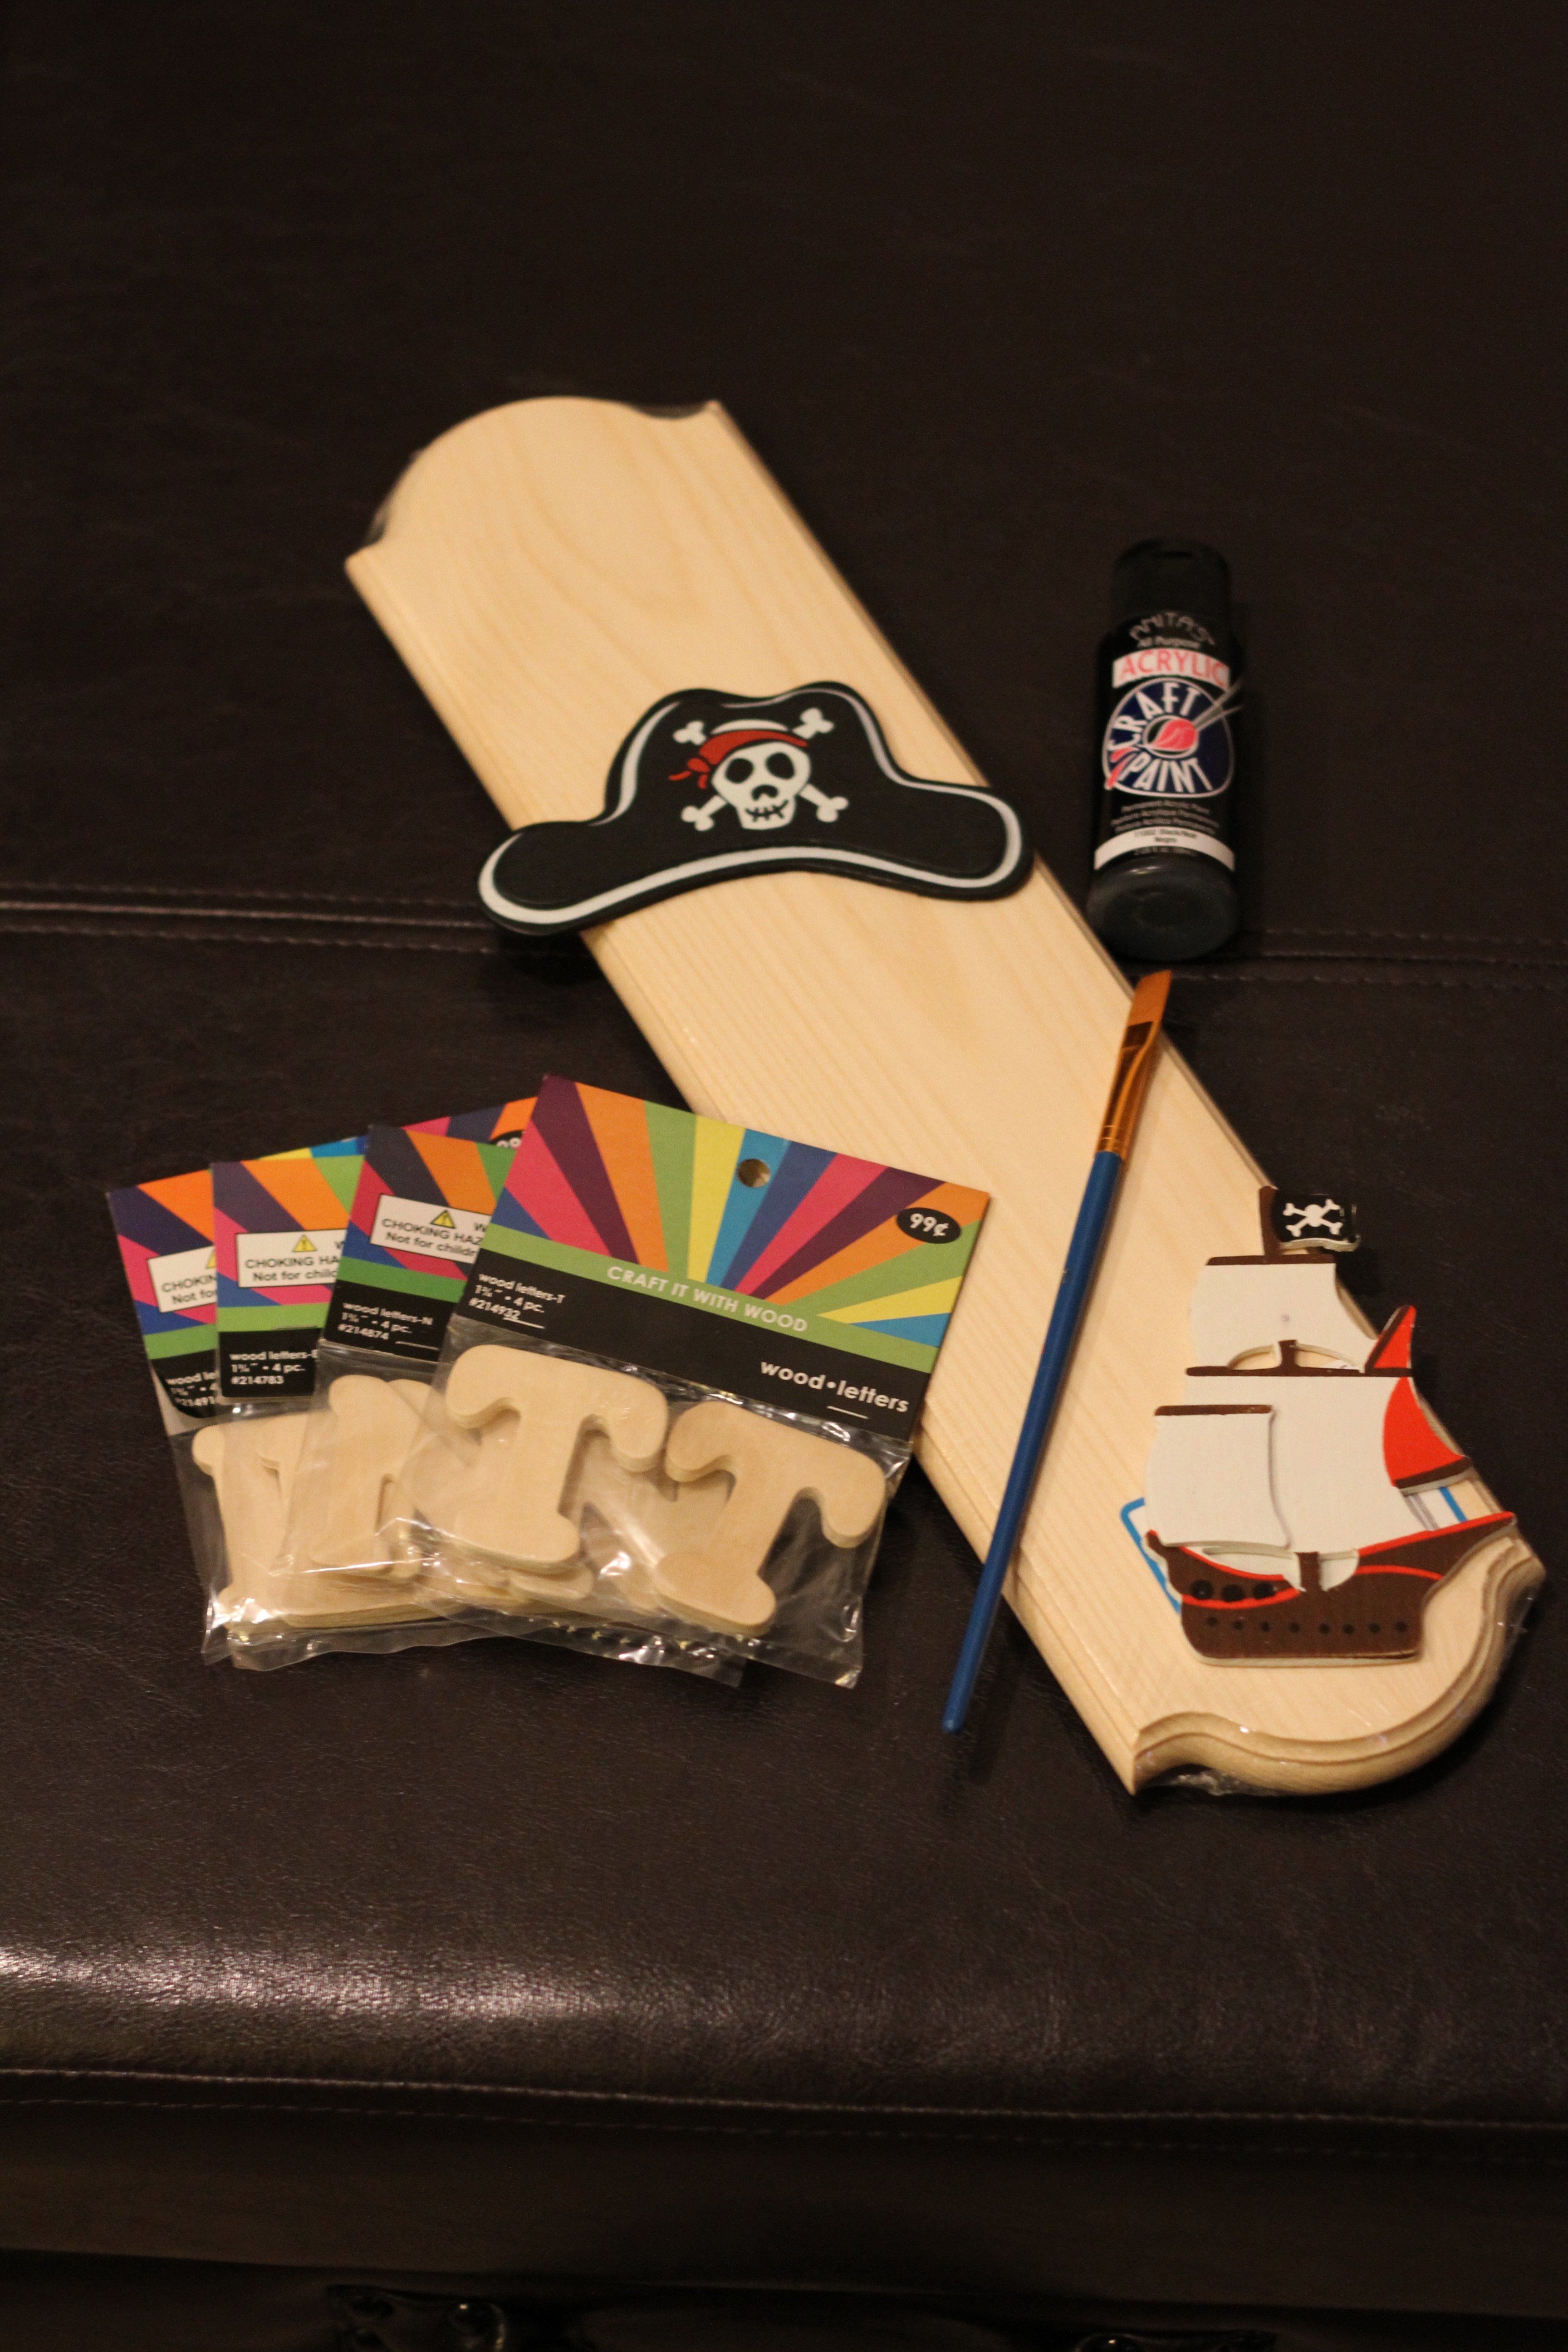
I poured some of the black paint onto a paper plate and arranged the wooden letters as such.

I then painted two coats on each letter on one side around the edges.

Once the letters were dry, I used the hot glue gun to glue the letters to center of the sign and the wooden pirate cutouts on each side.

I then cut a long strip of double sided adhesive tape and placed it on the back of the sign…

…and pressed it up against the door to the nursery.

There’s no doubt about it…that Trent’s room! Arrrr!

Be sure to check out our other DIY Projects from Trent’s Nursery!
DIY Jumbo Hanging Barrel of Monkeys
The Photographer’s Wife fans, be sure to:
Subscribe to our posts
Follow us on Twitter
DIY Growth Chart Ruler
We liked the idea of tracking Trent’s height growth throughout the years, but since we might not be in this house forever, we didn’t want to track it on a wall that we would have to leave behind if we moved. 
So we decided to make our own growth chart ruler that can go with us wherever we go! And it fit perfectly with our theme for his nursery, too!

Brett searched “growth chart ruler” on Etsy and came across a custom vinyl decal from Ten23Designs. [you can also go to her website to order it HERE]
The decal is 6 feet tall and can be ordered in a variety of colors. When we ordered, there were different measurement options, so we made sure to specify that we wanted it in inches. Personalization is free, so we specified in the comments of the order that we wanted his name, Trent, printed too!
The decal arrived in 4 separate sections. Brett purchased a 6 ft. tall x 9 in. wide x 1 in. deep piece of wood…no need to cut it.
Place the decals where you will end up sticking them, making sure that your measurements line up. Only a half a foot will be at the bottom, since you will end up placing the bottom of the ruler about half a foot off the ground when you hang it on the wall.


It may be easier to cut the decals into smaller sections, so they are easier to work with. Peel off one side of the decal backing and stick the decal onto the wood and press down firmly,smoothing it out.

You may also benefit from a furry DIY helper nearby.

Slowly peel back the other side of the decal backing, leaving just the decal itself. By peeling slowly, you can catch any wrinkles before peeling too far.

Do this for all the sections and the name!

Spray several coats of clear coat onto the front and sides to give it that somewhat shiny, finished look. We used Valspar Clear Sealer Gloss. Let dry between each coat.


Screw on a mounting hook to the back of the ruler towards the top.

Place two felt pads on the back of the ruler towards the bottom, so it will rest firmly against the wall.

Hang onto the wall, making sure to line up the measurements from the ground (the 1 on the ruler will measure 1 foot off the ground).

Now, you’re ready to track your child’s height and don’t have to worry about leaving those memories behind if you move!

Be sure to check out our other DIY projects from Trent’s Nursery!
DIY Jumbo Hanging Barrel of Monkeys
The Photographer’s Wife fans, be sure to:
Subscribe to our posts
Follow us on Twitter