Home Stuff

Cuisinart Baby Food Maker & Bottle Warmer Review & Giveaway

Cuisinart has a fairly new line of baby products. Exciting, right?! The line-up includes a Baby Food Maker & Bottle Warmer, a Baby Bottle Sterilizer and other baby-focused products. We love Cuisinart and have several appliances in our kitchen and I’m sure Brett would have more if we had more counter space.

When Trent turned 6 months old, we immediately started making him baby food at home. We tried a new food every week or so after starting with sweet potatoes…some he liked, some he didn’t (and we are coming to find that we have one picky little eater on our hands!) but we enjoyed making our own baby food. We felt it was much healthier, more nutritious and surprisingly much cheaper than buying jars of baby food.

We also used a bottle warmer to warm up his bottles. It truly was one of the most used baby products in our arsenal.

In order to make the baby food, we would use a steamer pot or the oven, then a chopper (a Cuisinart!). Brett thoroughly researched the existing baby food steamer/chopper appliances on the market and ultimately decided that this was the best way to go. So we went the long route with items we knew would work. It was still a pretty easy process, but when we saw that Cuisinart had a Baby Food Maker & Bottle Warmer in one, we were excited to try it.
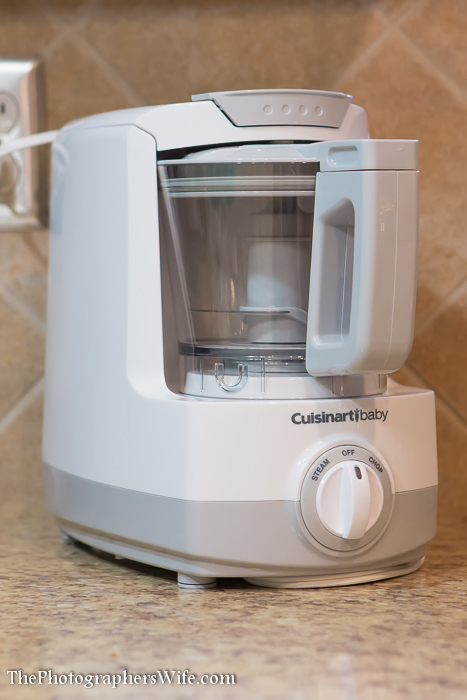
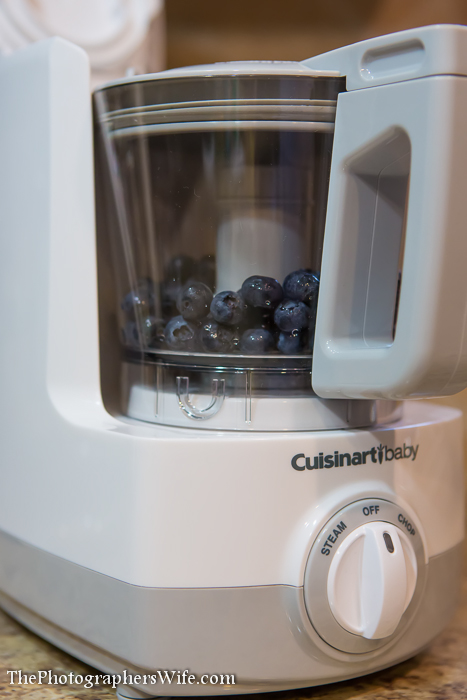
Cuisinart Baby-1

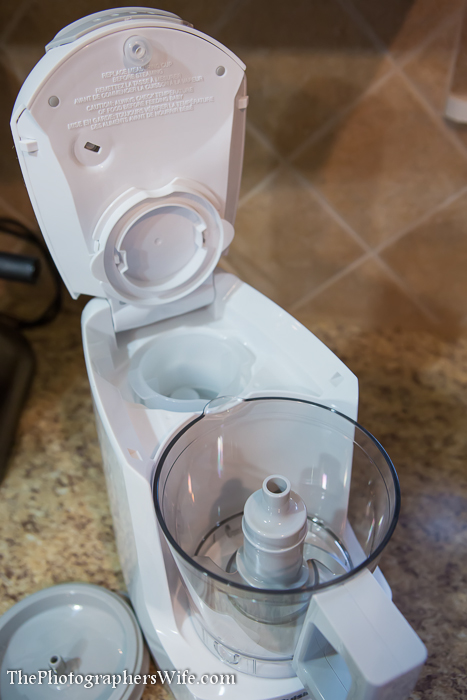
Remember what I said about counter space? This product helps by combining 3 tasks into one product: a bottle warmer, food steamer and food chopper.
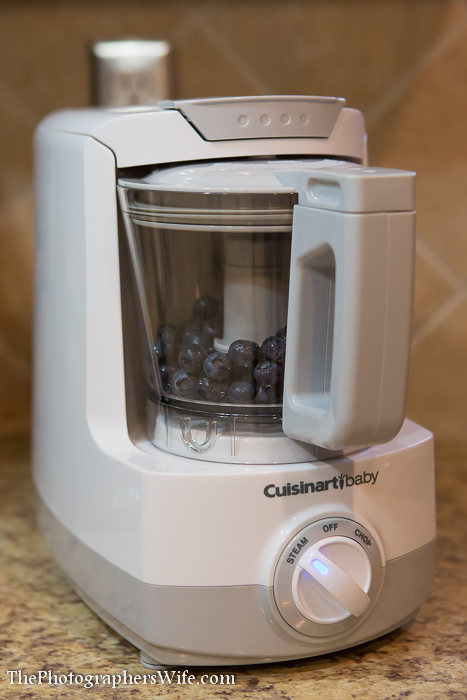
Cuisinart Baby-2

From Cuisinart:

The new Cuisinart Baby Food Maker & Bottle Warmer is a fast and easy way for parents to turn the foods they choose into healthy meals for baby – the unit steams and purees in the same bowl. A 4-cup work bowl allows for a significant amount of leftovers, which can go right into the refrigerator or freezer. Additionally, a built-in bottle warmer heats baby’s bottle to just the right temperature.

  • Steam, chop/pureé and bottle warmer functions
  • 4 cup work bowl
  • Patent-pending Bladelock System holds the blade in place while pouring
  • Steam blade creates even steam distribution for quicker, more efficient results
  • Bowl seal to prevent spitting and improve steaming
  • User-friendly dial control with LED indicator light
  • Powerful motor for quick steaming and precise chopping
  • Recipe booklet, spatula, bottle adapter ring and integrated measuring cup included
  • 18-month limited warranty

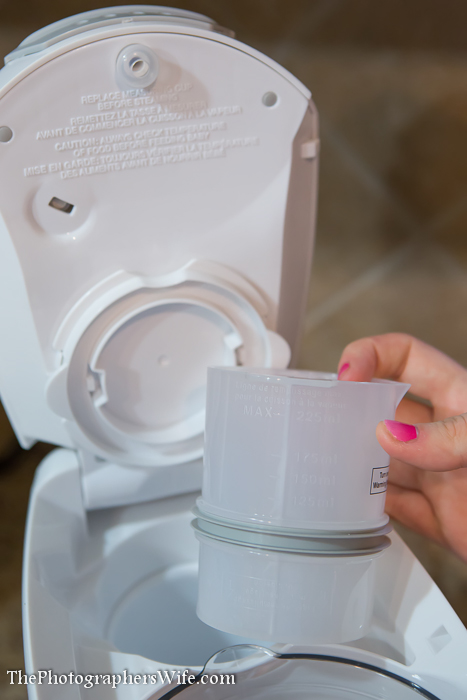
The bottle warmer is located in the back of the unit, which also serves as the water reservoir for steaming food. It comes with a measuring cup to measure the water you’ll need for each task.
Cuisinart Baby-3

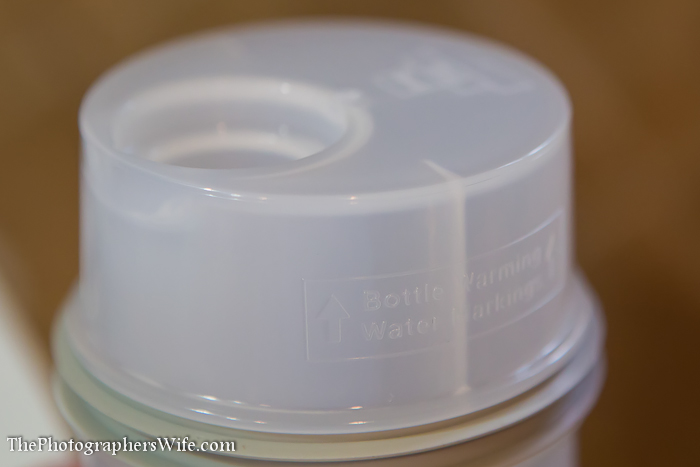
On one side, you can measure for bottle warming…
Cuisinart Baby-4

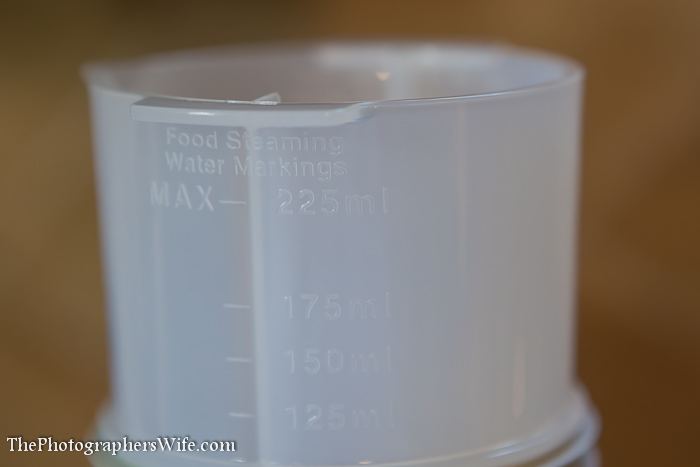
…and the other side measures water for food steaming.
Cuisinart Baby-5

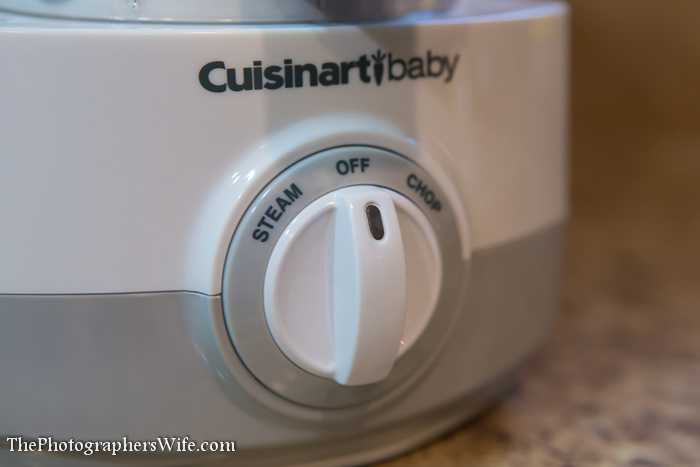
To warm a bottle, simply pour the required amount of water into the reservoir, then place the bottle into the reservoir and turn the dial to steam. The unit will turn off automatically once steaming is complete.

Cuisinart Baby-6 Cuisinart Baby-7

Even though Trent doesn’t really eat baby food purees any longer, we still try to come up with healthier versions of things that we can make on our own. Since he loves ice cream, we decided to make banana ice cream with blueberry sauce.
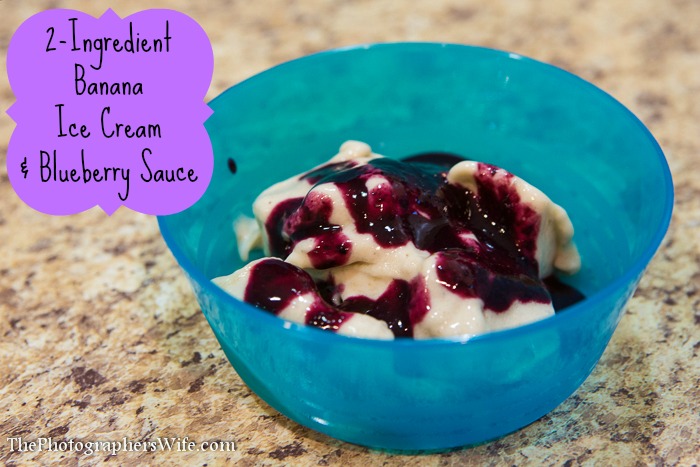
Banana ice cream

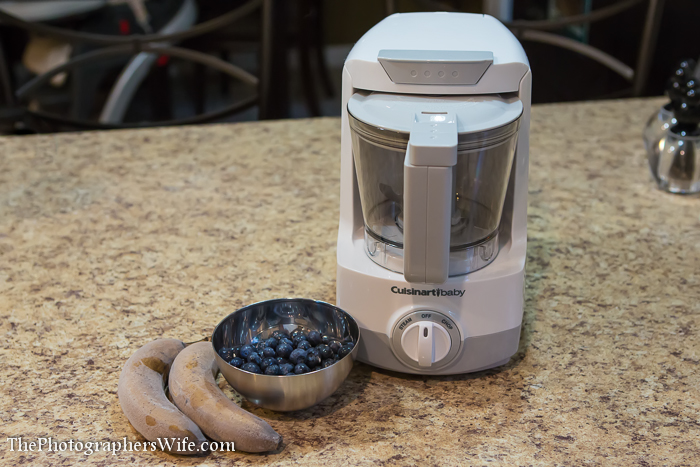
This banana ice cream is made of only one ingredient…frozen bananas! We placed 2 very ripe bananas in the freezer…but you could also cut them up and put them in a freezer bag before putting them in the freezer. He also loves blueberries, so adding some blueberry sauce gives it a little more oomph and yumminess. What a great way to sneak in some extra nutrition while he thinks he’s getting a treat!

Cuisinart Baby-8 Cuisinart Baby-9

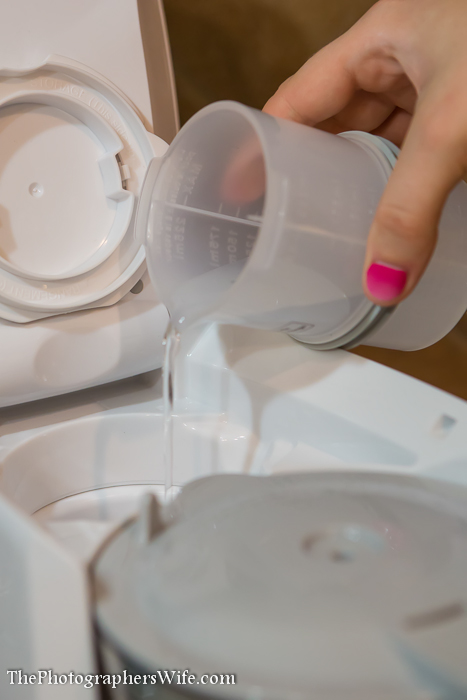
Make the blueberry sauce first by pouring the required amount of water (there is a chart provided with the unit with some guidelines) into the reservoir.
Cuisinart Baby-12

Then pour the blueberries into the steam/chop bowl and close the lid and the top of the unit.

Cuisinart Baby-10 Cuisinart Baby-11

Cuisinart Baby-13

Turn the dial to Steam. The light will turn on and you will see the steam accumulating in the bowl.
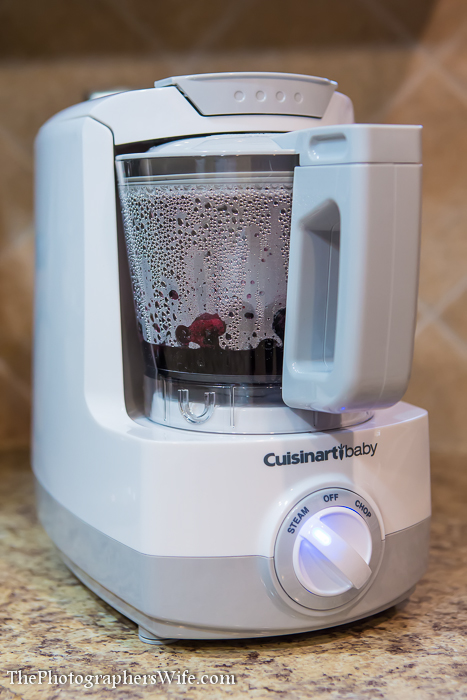
Cuisinart Baby-14

The light will turn off once the steaming is complete. Then simply turn the dial to Chop as many times as needed to reach the desired consistency. You can do quick chops or long continuous chops.
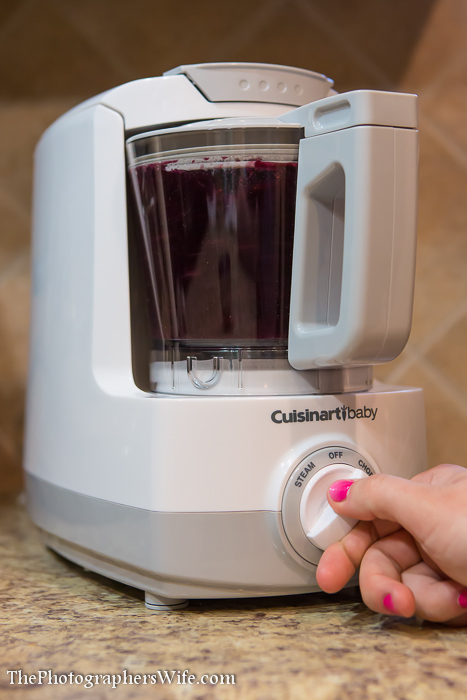
Cuisinart Baby-15

Pour the blueberry sauce into a bowl and set aside while you make the banana ice cream.
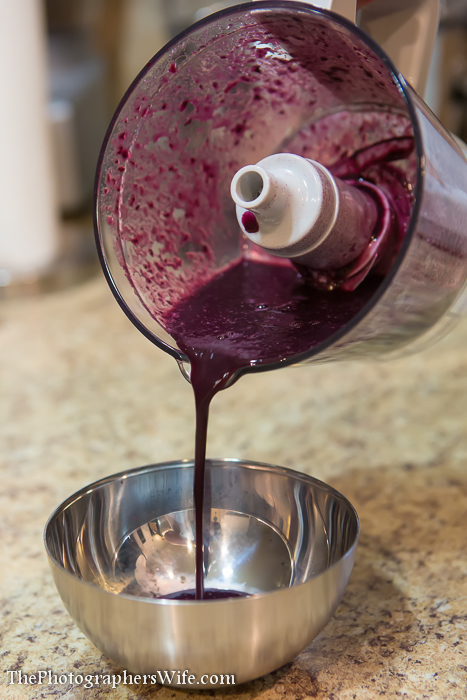
Cuisinart Baby-16

Clean out the bowl, then put your frozen banana pieces into the bowl, cover the bowl and close the unit.
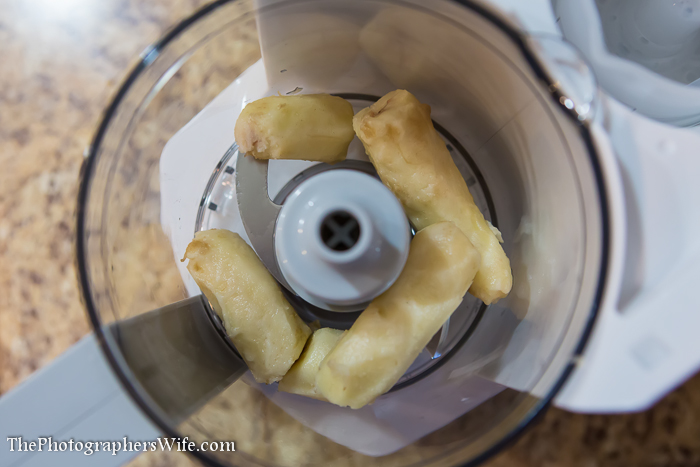
Cuisinart Baby-17

Turn the dial to Chop as needed until the bananas reach the consistency of ice cream.
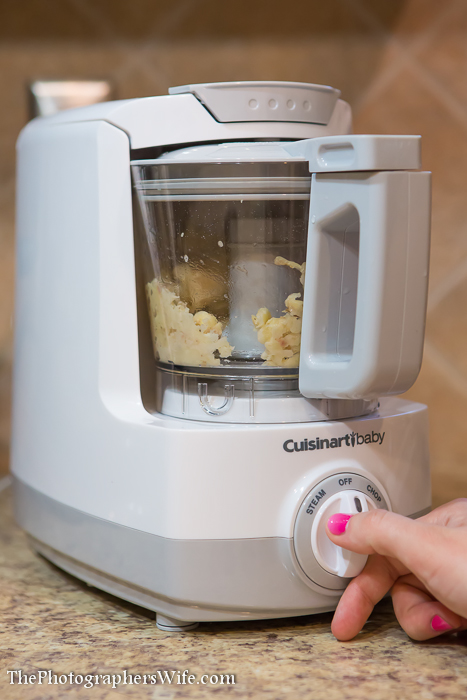
Cuisinart Baby-18

Scoop out the ice cream using the provided spatula.

Cuisinart Baby-19 Cuisinart Baby-20

Top your ice cream with the blueberry sauce and enjoy!

Cuisinart Baby-22 Cuisinart Baby-23 Cuisinart Baby-24

This would also be great to steam and chop healthy snacks for yourself. Want more baby food ideas? Check out the Cuisinart Baby website, where you can find recipes for different stages your baby is in, contests to enter, blog posts and other baby tools and ideas.

Where to buy:
Amazon
These online retailers

Cuisinart Giveaway

Giveaway!

Up for grabs: A Cuisinart Baby Food Maker & Bottle Warmer (a $129 value!)

How to enter: We’ll be using Rafflecopter for this one, so there are multiple ways to enter…pick one or pick them all!

This giveaway ends on Sunday, August 4, 2025 at 11:59 pm EST. US only please. I will contact the winner the next day by email and will announce the winner as an update to this blog post. Good luck!

{If you are viewing this post in an email or RSS feed, please click over to the blog to enter the contest using the Rafflecopter form :) }

a Rafflecopter giveaway

xoxo
Lynn

Subscribe by email | Like us on Facebook | Follow us on Pinterest | Subscribe on YouTube


I was given this product in exchange for a review and giveaway. All opinions are my own and 100% honest.

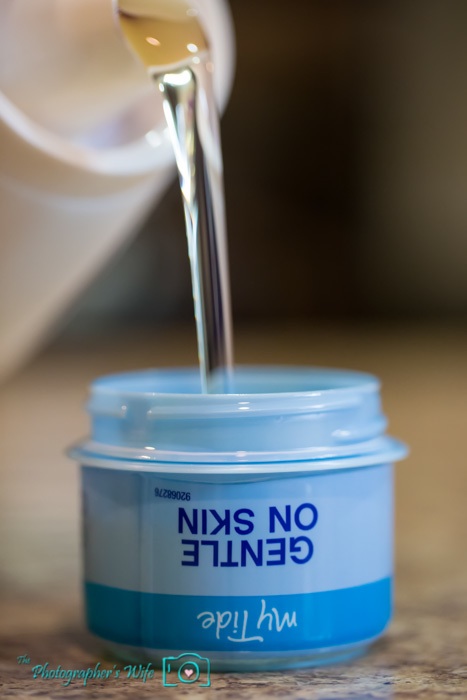
Tide Free & Gentle Laundry Detergent Review

When I was pregnant and all the baby clothes started pouring in (oh, who am I kidding? I was the one who couldn’t stop buying baby clothes!) I knew that at some point I would have to wash all of them before Trent was born. I had always heard it was a good thing to do so in order to wash away anything that would be on the clothes, leaving fresh, clean clothes for your brand new baby so their sensitive skin and new immune system wouldn’t be exposed to anything that could make them sick or cause a reaction.


But since I am kind of lazy when it comes to laundry (I’m a “throw-everything-in-the-same-load-and-use-cold-water” type of gal) I was excited to see that there was a laundry detergent option that our entire family could use…Tide Free & Gentle.


Tide Free and Gentle-1


It was easily available, came in a large enough container, wasn’t espensive (especially if you have coupons!) and wasn’t limited to just baby clothing use…all while being free of dyes and perfumes and dermatologist tested. It also comes in a high efficiency (HE) formula (which is what we typically use, but not the sample we were sent and therefore not pictured).

When I washed all of Trent’s baby clothes before he was born, I used Tide Free & Gentle. But once the detergent that we were using on our clothes ran out, we decided to make the switch entirely to Tide Free & Gentle.

We average about 3-5 loads of laundry a week (which I’m sure is NOTHING compared to what some of you moms have to do each week!). Since Trent is only 9.5 months old, his clothes are still quite small and we can fit all of his clothes from a week into one load. But I know as soon as he gets older, that number will multiply along with the amount of dirt and messes, which is why I think it’s great that Tide Free & Gentle is comparable to the other detergents I’ve used at removing dirt and even works great using cold water!You never know how a baby’s skin will react to certain ingredients or chemicals, so I am happy and content knowing I can at least help reduce the dyes and perfumes he is exposed to….it is great for all of our skin, too! Even though After using Tide Free & Gentle, our clothes smelled clean…not perfumy, bleached or dirty.

Tide Free and Gentle-2

I would definitely recommend Tide Free & Gentle for all moms, not just moms of babies with sensitive skin. If it works just as good as other detergents, why not continue using it for everyone in the house?!

On a sidenote, the Tide Free & Gentle was sent to me from Soap.com. It was nice receiving household products right to my doorstep without having to get everyone ready and make the journey to a store…it was so convenient and perfect for my laziness!

You can find Tide Free & Gentle at your local big box retailers, grocery stores, Amazon and of course, Soap.com.

I received Tide Free & Gentle samples as part of the Cafemom Influencer Program, but I’ve already been using it for several months. As always, my opinions are my own and 100% honest (especially the part about being lazy!).


If you enjoyed this post, please leave a comment below, share it or…

Subscribe by email | Like us on Facebook | Follow us on Pinterest | Subscribe on YouTube


NeuYear Calendar Review & Giveaway

I have a confession. One of my favorite things to do each year usually occurs around this time and it has nothing to do with turkey or Christmas (although those are pretty awesome too).

I love picking out a calendar/planner for the new year.

I know, I’m weird right? But I LOVE to organize and plan events, write in everyone’s birthdays, schedule vacations (who doesn’t love that?!) and create goals for myself. I am Type A to the fullest, but I must admit that being a new mom has thrown my controlling ways for a loop. Like a roller coaster loop. I mean, we rescheduled Trent’s first Disney vacation 3 times already! So having a way to plan things and remember to pay bills is even more important now than ever. Mommy brain is real! And because I’m trying to remember these days as they fly by oh-so-fast, I like writing down when Trent reaches new milestones and his stats from his doctor’s appointments.

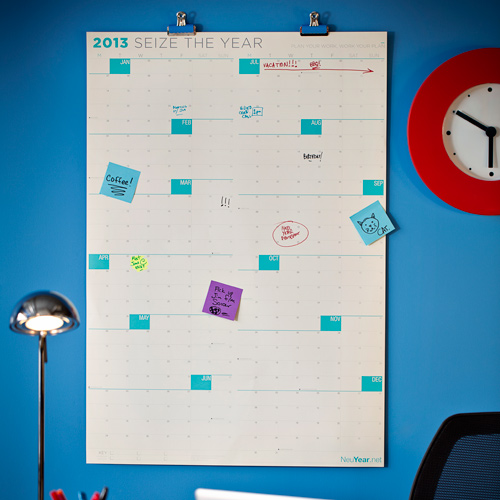
So I’m trying something new to me…a NeuYear dry-erase calendar that shows the ENTIRE year at one glance!


Here’s why I think this calendar is awesome…

-It’s BIG.
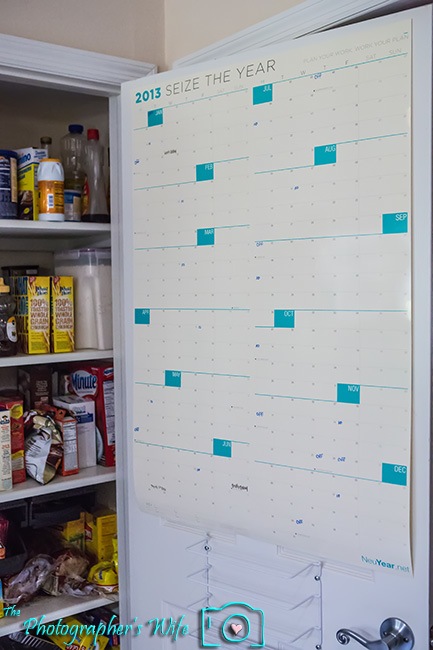
At 27″ x 39″ - It shows you the whole year at once, which means I don’t have to page through a traditional calendar (or on a small computer screen or phone), to see the whole year.

-No gaps
Unlike other calendars, this one has no space between months. The philosophy here is that the week is the currency we think in, so this calendar focuses on presenting 52 weeks, rather than 12 months. This feature helps you plan across months easily, and see clearly the distance/days between any two dates in the year. It will also motivate you to see weeks passing, deadlines approaching and goals accomplished.

- Laminated for use with dry erase and dry wipe markers: This will be great for when we inevitably reschedule vacations or events. I hate having white-out all over my paper calendars.


- Week is grouped into weekdays and weekend, for greater visual clarity

- Dotted vertical lines reduces “chart junk” and emphasizes your deadlines

- Has vertical and horizontal orientation on either side of page


- Fits perfectly on your door or above your desk

-The COLOR! Turquoise is one of my favorite colors!


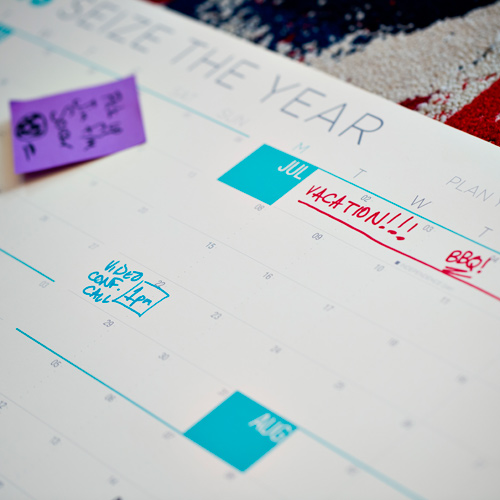
I put my calendar on the inside of my pantry door in the kitchen and here’s what I plan to put on it.

-Meal Planning: This is why I put it on the pantry door (besides the fact that it fit perfectly). I’d like to be better at planning meals for the week and grocery shopping accordingly, so we’ll write our daily meals down and grab what we need from the pantry after looking at the calendar for that day.

-Health & Fitness goals and events: I want to create some weight loss and fitness goals for myself and this calendar is PERFECT for that since it shows the year in weekly format and I tend to give myself weekly goals. I also want to run a Disney race in the near future (anyone want to sponsor me? I’ll wear your t-shirt, hat, underwear…lol) so I will write the 2013 race dates as they become available in order to decide what to do. I’m thinking a nice fall vacation centered around a Disney race sounds kinda fun.

-Vacations: What better way to count down to a vacation than a calendar that shows the entire year and allows you to see your vacation dates every.single.day that you look at it? Nothing like seeing a vacation to make you stick to your fitness goals too, huh?

-Birthdays, days off work, events we want to attend and Brett’s photoshoots

-Work deadlines: As an accountant, I have days that I really have to be at work, so I will be writing those times in there to make sure I don’t schedule anything during that time.


This calendar would have also been good to use at work, but my job buys us a calendar each year, so I might as well take advantage of that…after all, it is in the budget ;)

I’m excited to see what 2013 year brings…after all, 2012 was pretty epic with having a baby and all. :)


What about you? Do you look forward to getting your new calendar each year or am I just weird like that?

If you are in the market for a new calendar for yourself, your family, work or a gift for someone else (this would be great for moms!), you can use code “ThePhotographersWife” for 30% off your calendar purchase at www.NeuYear.net (expires 12/31/12). Or you can enter our giveaway below to win one!!


**GIVEAWAY**

Thanks to the folks at NeuYear, you have the chance to win one of two NeuYear calendars! That’s right…TWO winners will receive a 2013 calendar valued at $30 each! We’ll be using Rafflecopter again (form below), so that means you have plenty of ways to enter the contest…pick as many as you’d like. The more things you do, the more entries you get! The calendars will be sent to the winners directly from NeuYear. Contest ends Saturday, December 8th at midnight. US only please!


a Rafflecopter giveaway

Let’s make 2013 epic together! :)


I did not receive any compensation for this post, although I did receive a calendar to review. As always, all opinions are my own and 100% honest.
 

Benjamin Moore Aura Paint IKEA Upgrade

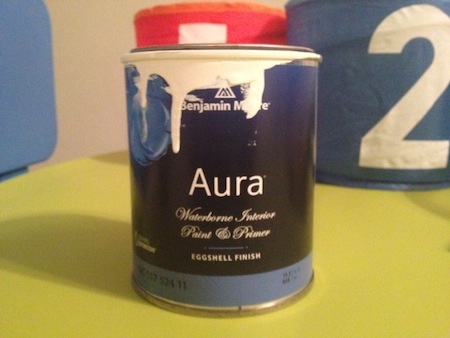
As a BzzAgent, I was recently invited to try Benjamin Moore Aura Interior Paint.


From Benjamin Moore/BzzAgent:

Aura® Waterborne Interior Paint with Color Lock® technology is, quite simply, the finest paint Benjamin Moore has ever made. No other paint rivals its performance, durability and vitality. Introduced in 2006, Aura® was the first product launched on the Gennex® colorant system, and it revolutionized the industry with its combination of high performance, low odor and low VOCs. Superior paint that is more eco-friendly? That’s a win-win within any home.

And we haven’t even touched upon the colors. Oh, the colors! Thanks to Benjamin Moore’s exclusive Color Lock® technology, Aura® paint delivers truer hues and richer colors and looks fresh for years. The line covers like no other — even the deepest Aura® shades never require more than two coats. And if that’s not enough, Aura® is available in every Benjamin Moore color, including the Color Stories® Palette. With over 3,600 colors to choose from, there’s almost no limit to what your roller can do.


I was immediately excited and accepted the campaign. We needed a swift kick in the butt to get on a project that we’ve been dreading…the dining room wall.

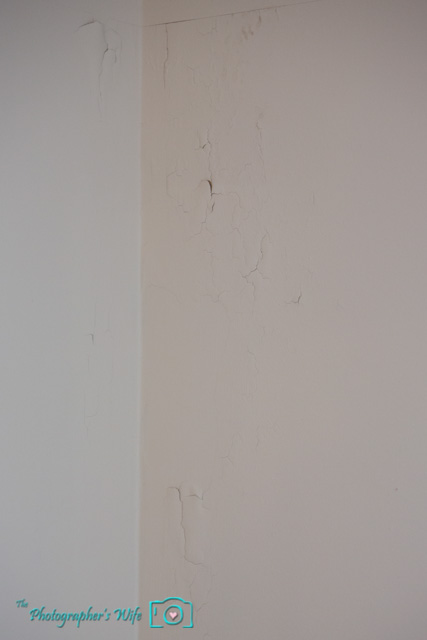
Ok, that doesn’t sound or look like a big deal, but that’s because you may not be able to see the true monster hiding underneath that crackling paint…


WALLPAPER! (Cue scary theme music)

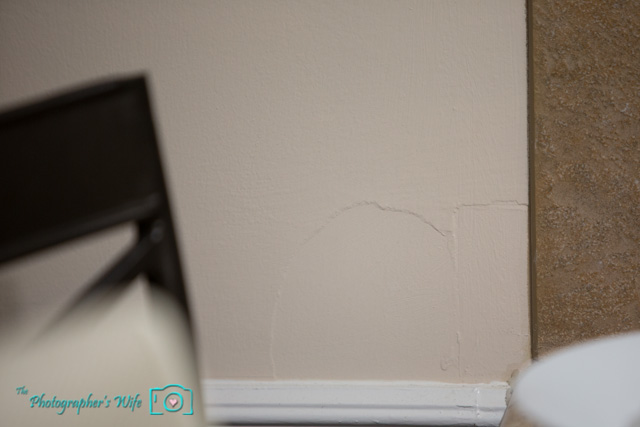
That’s the upper corner of our dining room. It started out with just a couple of cracks in the paint, but it has slowly grown. When we moved in 3 years ago, the interior of the house had already been painted by the previous homeowner who basically did a “flip” on the house by revamping it a little in order to up the appeal factor. Well, it looks he attempted to peel back the wallpaper and gave up rather quickly.


He then must’ve just decided to paint over it and we are now left with a wall that is slowly peeling back more and more. Sneaky bastard.

When the house was inspected, the inspector said there might have been a leak in that corner at some point, but that it appears the leak has been fixed. Because of that, we were hesitant to fix the wall before getting the roof replaced and just dealt with it by not looking in that corner. Now that we are in talks to replace the roof (Holy EXPENSIVE Batman!), we thought now would be a good time to tackle the project. So I accepted my Aura paint Bzz Campaign with full intentions of getting on that ASAP.

Then the man of the house told me it wasn’t going to be a quick and easy task, so I figured we could do it over one of our weekends. However, with Bzz Campaigns, you only have a certain amount of time to report back on your project and before we knew it, all of our weekends were full with activities and we had no time to complete the project. Sad face.

I wasn’t about to give up, though. And besides, I was given a product to try…so I’m going to use it darn it! It’s also been a while since my last craft project so I decided to upgrade Trent’s IKEA easel!


We bought this during our IKEA shopping extravaganza for all of Trent’s nursery items. Seriously, $15 for this easel is an absolute steal. I frickin love IKEA and wish we had one in our town and didn’t have to drive almost 4 hours to the one in Orlando.

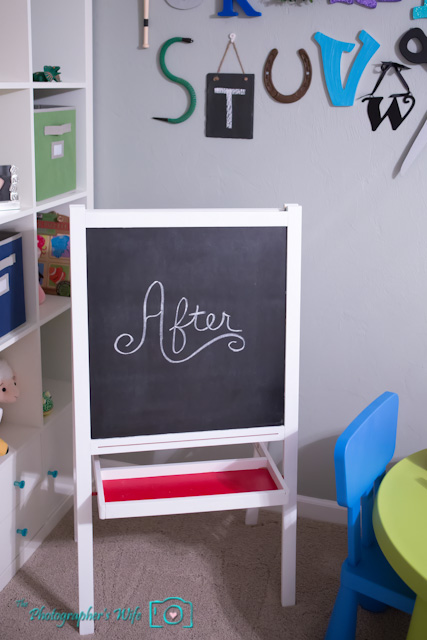
Most of Trent’s furniture is white, so I decided to paint the easel to match his other furniture using a small can of white Benjamin Moore Aura paint. Interior paint isn’t just for walls! And since I’m lazy, I was hoping that by using a higher quality paint and primer in one would mean I would only have to use one coat to complete the project.


I couldn’t find our large plastic sheet to put on the floor underneath the easel to prevent splatter on the carpet, so I just turned one of his rugs over instead. I was going to risk it and not put anything down, but good thing I didn’t since I ended up getting 3 drops of paint on the back of the rug. Oopsie.

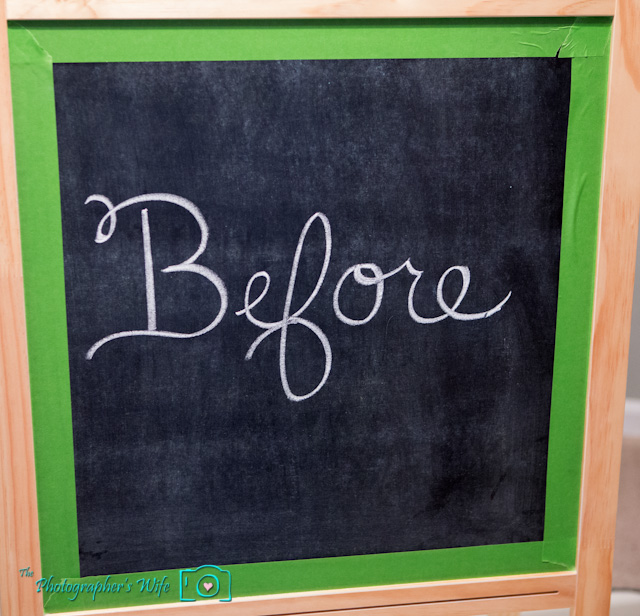
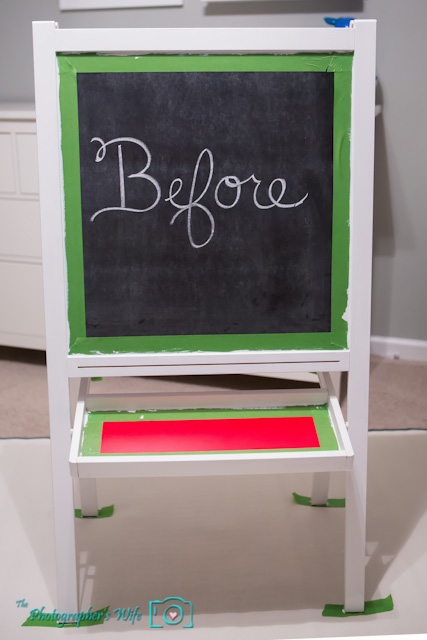
I used Frog Tape to tape off around the wooden edges so the paint wouldn’t get on the chalkboard/whiteboard.


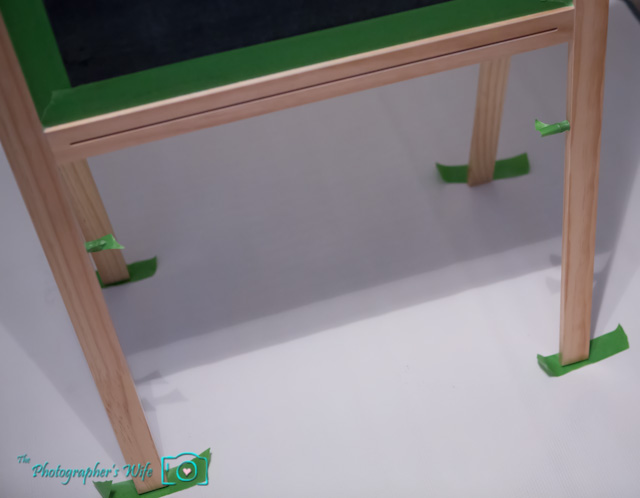
I also put a strip of Frog Tape under each of the legs to not get paint on the rug.


After one quick coat, I let it dry for a few hours while we went out. The paint went on smooth with great coverage and I didn’t have to go over the same spot repeatedly.


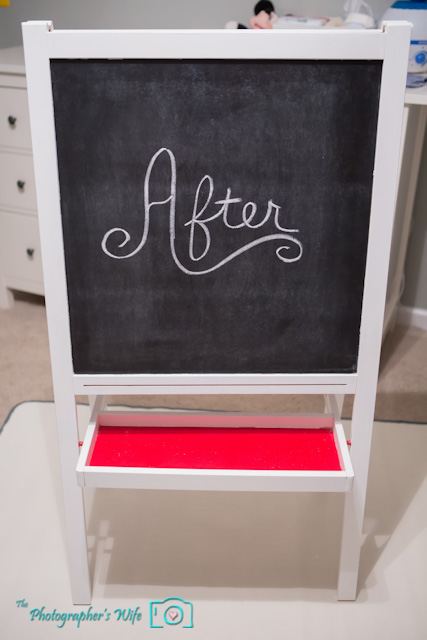
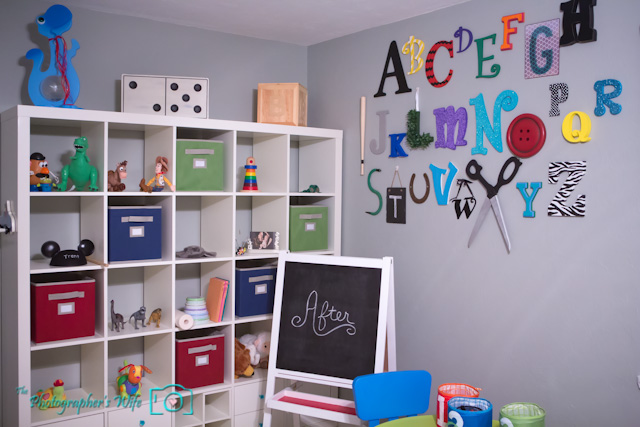
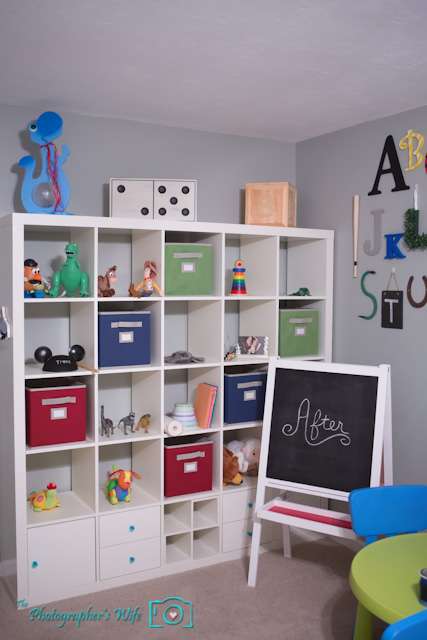
I pulled the tape off and TA-DA! It now matches the rest of the room!


I can’t wait to try this with an entire room. We’ve used Benjamin Moore paint before in Trent’s nursery and it was great (you can see it in the above photos - the color is Grey Horse). I was pregnant at the time, so the low VOC feature was perfect, along with the ease of application meant I could help paint without hurting my pregnant self.

As for the dining room, we have our paint ready for when we finally decide to tackle that hot mess and we will definitely share our experience here with you guys. I’m actually interested in finding out what kind of tacky wallpaper is hiding under there!


Disclaimer: I received this product for free as part of BzzAgent campaign in return for my honest, hype-free opinion. All opinions are my own and I was not compensated in any other way.


***

The Photographer’s Wife fans, be sure to:

Subscribe to our posts

Like us on Facebook

Follow us on Twitter


Glade Expressions Review

I LOVE candles and things that make my house or office smell nice, especially since I’m surrounded by boys at home. I find a flickering flame on a candle to be very relaxing, but with a child in the house that is soon to be on the move, candles may not be the best way to go. Glade has several products that help with this conundrum. I use their plug-ins in several rooms of the house, but I don’t always like leaving things plugged in either.


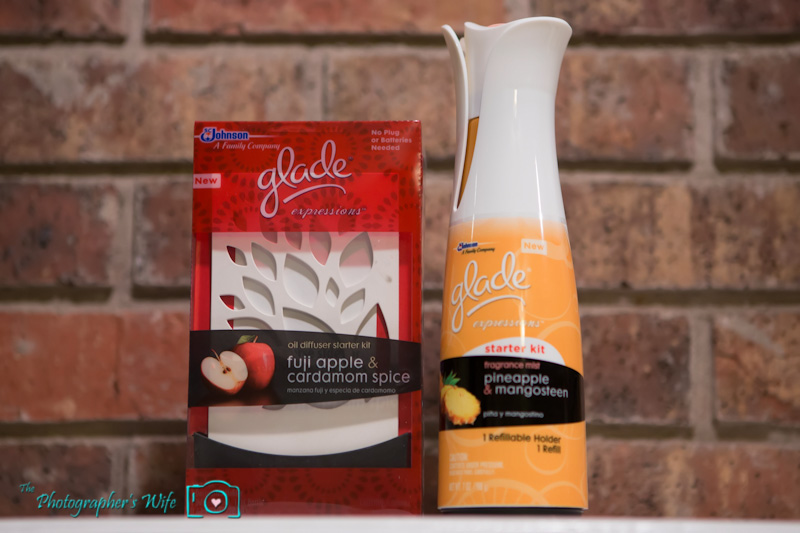
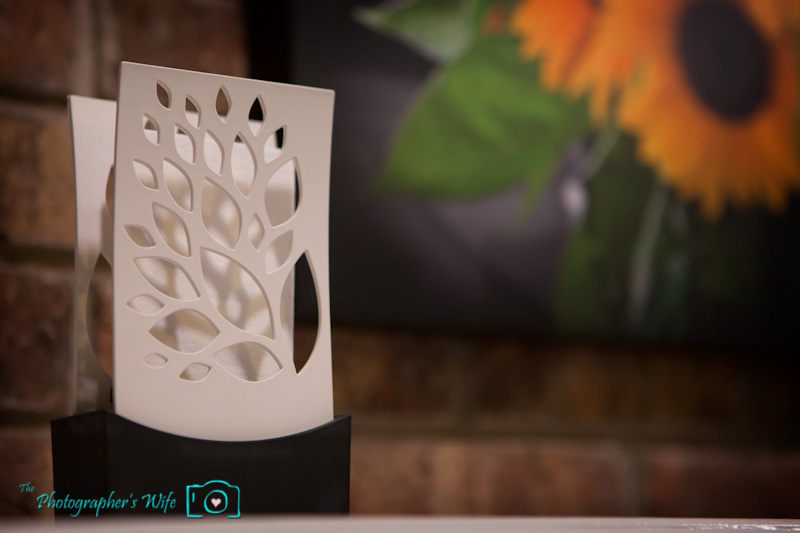
I was glad that I was asked by BzzAgent to participate in a campaign to try two of Glade’s new products in their Expression line, the scented oil diffuser kit and the fragrance mist kit. Both products are designed with eye appeal in mind and are meant to be placed out in the open, rather than hidden in a closet only to be pulled out when used.


Each product offers several scents, but seeing as it is Fall, I chose the Fuji Apple & Cardamom Spice scent for the oil diffuser.


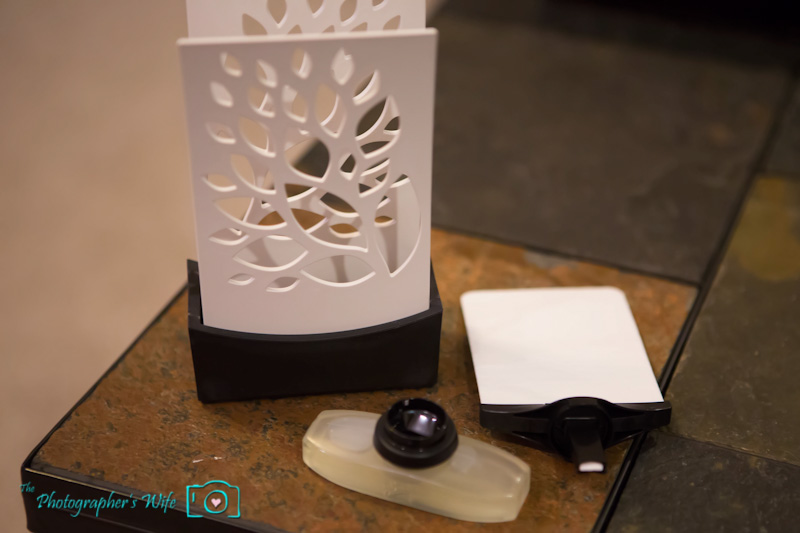
This was easy to set up, there is a container of oil that sits at the bottom and you just snap the diffuser sheet into it; both are refillable. Once placed between the decorative outside walls, it can be left out and the scent is supposed to last 30 days.


I like that I can set it and forget it. It’s also pretty to look at. It took about an hour for the scent to start filling the room, but yet it was a light scent that wasn’t overwhelming.

For the fragrance mist, I wanted to test a different scent, so I got the Pineapple Mangosteen.


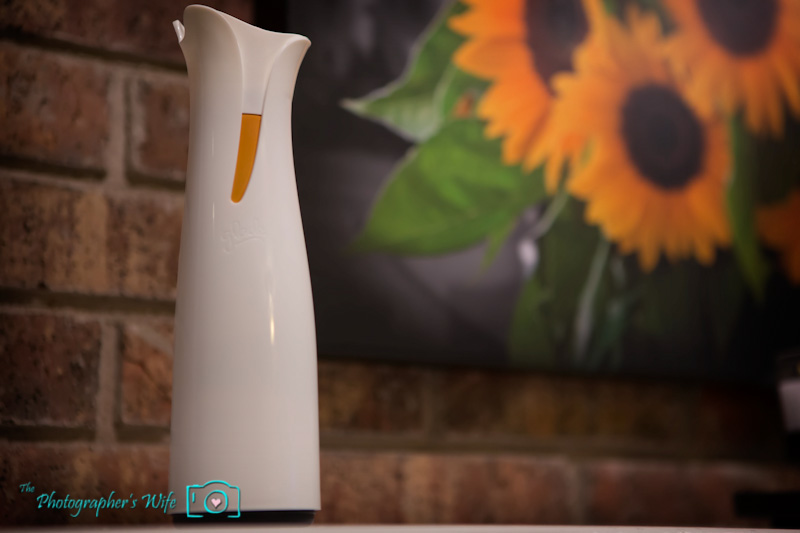
Room sprays are typically meant to give a quick burst a scent to a room when needed, and that is what this does. The pineapple scent is refreshing and not overwhelming; kinda like I’m in a Hawaiian oasis…not that I would personally know, but you get the point. The room spray itself is a refillable container that snaps into the decorative holder, which is way better looking than typical room spray cans, although with a child in the house, I don’t think I will be leaving this one out where he can reach it.

Overall, these are two nice new additions to the Glade collection.


Disclaimer: I received this product for free as part of BzzAgent campaign in return for my honest, hype-free opinion. All opinions are my own and I was not compensated in any other way.


***

The Photographer’s Wife fans, be sure to:

Subscribe to our posts

Like us on Facebook

Follow us on Twitter